Appearance
Settings
Access Settings from the toolbar. The settings overlay has several sections.
General
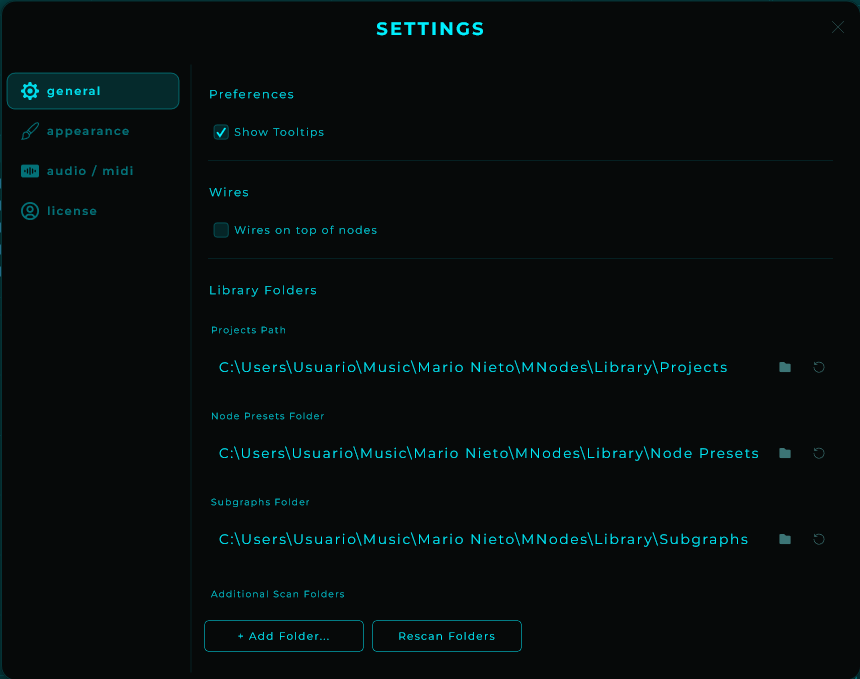
| Setting | Description |
|---|---|
| Projects folder | Override the default user presets location |
| Node presets folder | Override the node presets location |
| Subgraphs folder | Override the subgraphs location |
| Modules folder | Override the modules location |
| Extra scan paths | Additional folders to scan for presets and content |
Factory content
MNodes can ship a curated factory collection: ready-made node presets, subgraphs, modules, and projects (with their artwork). General has a button that downloads this official pack from the Hub and installs it into the Factory folders of your Library.
 Needs: screenshot of Settings > General showing the Install Factory Content button highlighted with the theme accent colour.
The button label tells you the current state:
- Install Factory Content while nothing is installed yet. It is highlighted with your theme accent colour so it is easy to find.
- Reinstall Factory Content once a pack is installed. Reinstalling only refreshes the official content; it never touches your own work.
Where the content lands:
- Factory content goes into read-only Factory folders inside your Library.
- Your own work lives under User and stays untouched.
- Anything you download from the Hub stays separate too.
Reinstalling only writes to the Factory folders. It can never overwrite or delete your User content or your Hub downloads.
Three ways to get factory content
- The General button above downloads and installs the official pack from the Hub.
- A one-time prompt on first run ("GET FACTORY CONTENT?") offers the same download. Accept it and the pack installs with your consent, or skip it and it stays quiet from then on. If a download fails (for example the server is briefly unreachable), MNodes offers again next time you launch instead of giving up.
- Drag a
.mnpackfile onto the graph to install a local pack straight from disk.
Needs an active license
Every way of getting factory content (the button, the first-run prompt, the Hub download, and dropping a .mnpack) needs a valid license. Nothing is downloaded or installed until you have activated a correct serial. See License below.
MNodes records which version of the pack you have, so a later reinstall only downloads when the Hub has something newer.
Audio / MIDI
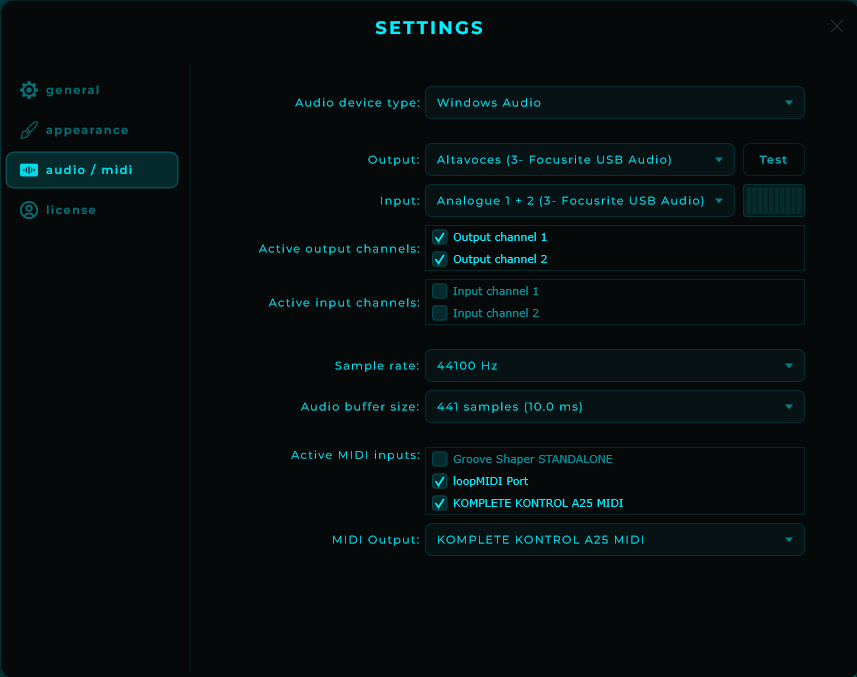
| Setting | Description |
|---|---|
| Audio driver | Select audio driver (ASIO®, WASAPI, CoreAudio, etc.) |
| Audio device | Choose your audio interface |
| Sample rate | Set the sample rate |
| Buffer size | Set the audio buffer size (lower = less latency, more CPU) |
| MIDI input device | Select MIDI controller (standalone only) |
TIP
In plugin mode, audio and MIDI settings are managed by your DAW. These settings only apply to standalone mode.
On Windows, the standalone app ships with ASIO driver support for the lowest latency with audio interfaces: pick your interface's ASIO driver under Audio driver. The native Windows drivers (WASAPI, DirectSound) remain available and stay selected by default.
ASIO is a registered trademark of Steinberg Media Technologies GmbH.
Multichannel input and output
MNodes opens in stereo by default, so existing sessions are unchanged. The main input and output buses can each widen to up to 8 channels, independently of one another.
In the standalone, enable more than two input or output channels here in Settings > Audio / MIDI to work with a multichannel audio interface. Once the bus is wider, an Audio In node can read those extra inputs and an Audio Out node can feed those extra outputs.
TIP
You set the channel count on each node with the Channels slider on the Audio In and Audio Out nodes. See the node reference for the details.
Appearance
Needs: screenshot of the full Settings > Appearance section showing the Text Contrast slider, the colour pickers, and the skin preset row.
Settings has an Appearance section again. It themes the whole interface, and the UI updates live as you make changes. Appearance is a personal preference saved in your UI settings: it is not baked into your projects or presets, so sharing a project never carries your colours with it.
Text Contrast
A Text Contrast slider at the top of the section raises the opacity of dim elements (faint secondary text and subtle icons) toward fully solid. It keeps each colour's hue intact, so nothing washes out toward white or black: dim elements simply read more clearly. It defaults to 0 (no change) and you can push it as far as you like.
Colours
Each colour has its own picker:
| Colour | What it paints |
|---|---|
| Background | The base colour for panels and the UI |
| Main | Text, borders, and UI accents |
| Audio | The Audio wire colour |
| MIDI | The MIDI wire colour |
| Data | The Data wire colour |
| CV | The CV wire colour |
| Graph Background | The node graph canvas fill |
| Grid | The graph grid lines |
| Node Body | The card fill behind every node |
| Panel Grid | The front-panel grid lines |
Needs: screenshot of the Appearance colour pickers showing Background, Main, the four wire swatches, and Graph Background / Grid / Node Body / Panel Grid.
Eyedropper
Every colour picker has an eyedropper button in the swatch strip, drawn in your theme's Main colour, to grab a colour from anywhere on the screen. Click it to enter pick mode, move the mouse to preview the colour under the cursor live, and click anywhere to apply it. Press Escape to cancel.
On Windows the cursor turns into a crosshair while you pick, and the click is consumed so it doesn't fall through to whatever is under the cursor. On macOS it uses the system colour sampler.
Needs: screenshot of a colour picker with the eyedropper button in the swatch strip highlighted.
Skin presets
Built-in skin presets give you a full look in one click, and you can build your own from there. You can also import and export "look" files to save a palette or share it with someone else.
Edit tools
While you are tuning a look you also get:
- Reset to factory to return to the default palette.
- Randomise to roll a fresh set of colours.
- Undo / redo for the colour edits you make here.
License
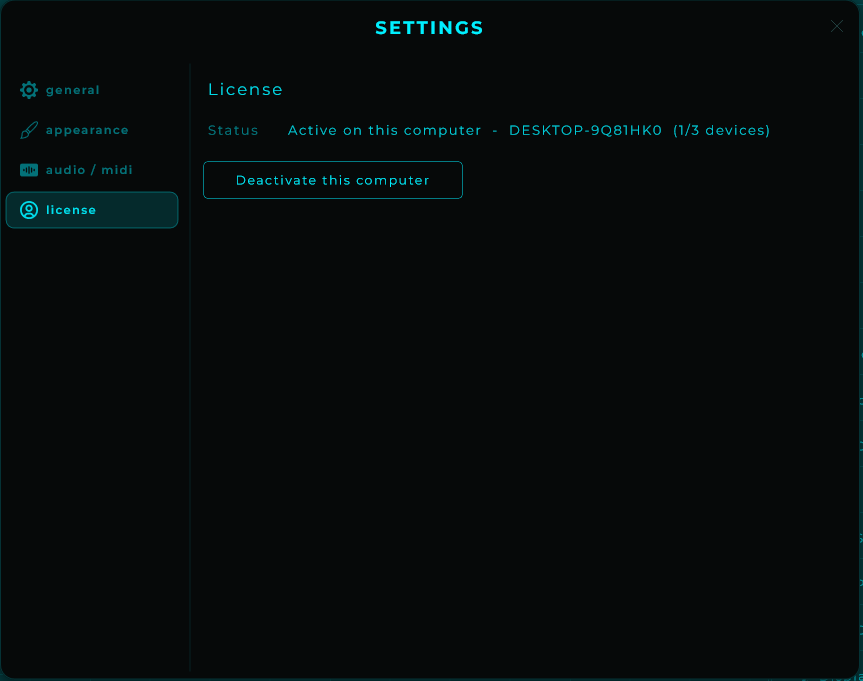
| Setting | Description |
|---|---|
| License status | Shows the current license state and the name of this computer |
| Active licenses | Shows how many licenses are currently active. MNodes can be used on up to 3 computers simultaneously |
| Activate | Enter your email and serial to activate MNodes on this computer |
| Version info | Current plugin version |
| Deactivate this Computer | Release the license from this computer so it can be used on another one. You can also manage your licenses from your account at marionietoworld.com |