
Appearance
Effects
Effects for shaping any sound: echoes, movement, pitch changes and a sense of space. Most controls can be driven by other nodes in real time, so you can connect a control signal (a CV, an LFO or an envelope) to a parameter's input dot and have it change automatically while the sound plays. The stereo effects take a left and a right input (and still work fine if you only feed them a single mono sound), while a few work on one mono channel.
AM / Ring Mod
Multiplies your sound by a second signal to create those classic metallic, bell-like, robotic tones. If you do not plug anything into Mod In, a built-in tone takes over so the effect works on its own.
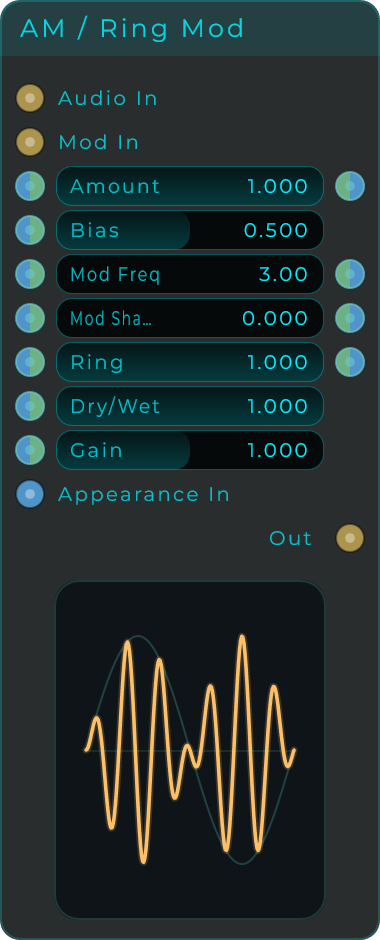
| Parameter | Range | Default | Description |
|---|---|---|---|
| Amount | 0.0 - 1.0 | 1.0 | How strongly the modulator multiplies the input. 0 keeps the dry sound, 1 is full depth |
| Bias | 0.0 - 1.0 | 0.5 | Offset added to the modulator. More bias leans toward classic AM, less leans toward ring mod |
| Mod Freq | 0.01 - 4000 Hz | 3.0 | Internal modulator frequency. Below 20 Hz it acts like a tremolo; above it adds sidebands |
| Mod Shape | 0.0 - 1.0 | 0.0 | Morphs the internal modulator from a clean sine toward a triangle |
| Ring | 0.0 - 1.0 | 1.0 | Blend from Amplitude Modulation (0, harmonic) to Ring Modulation (1, clangy, inharmonic) |
| Dry/Wet | 0.0 - 1.0 | 1.0 | Balance between the dry input and the modulated output |
| Gain | 0.0 - 2.0 | 1.0 | Output level after modulation |
Inputs: Audio In, optional Mod In, plus Amount, Bias, Mod Freq, Mod Shape, Ring, Dry/Wet and Gain (all accept CV). Outputs: Out (mono). Also emits Amount, Mod Freq, Mod Shape and Ring as data outputs.
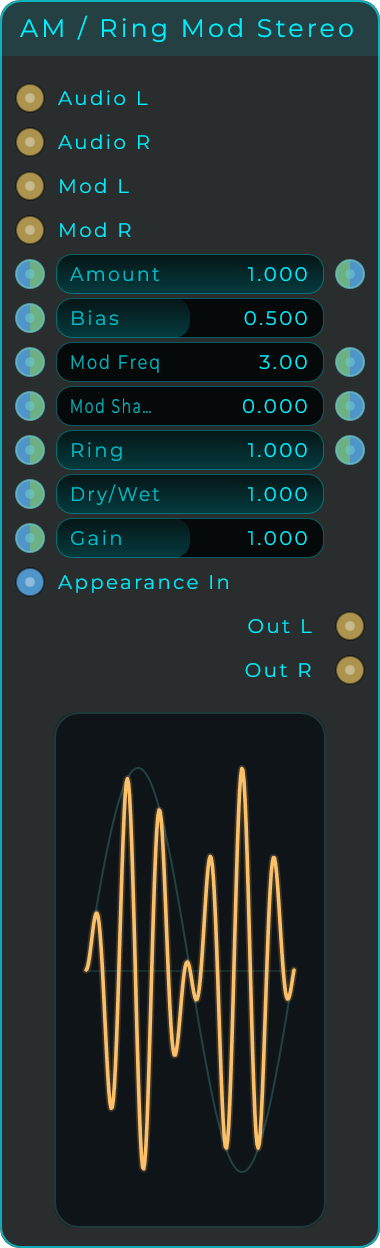
AM / Ring Mod Stereo
The same effect for a full stereo pair: Audio L/R and Mod L/R inputs run through one set of Amount, Bias, Mod Freq, Mod Shape, Ring, Dry/Wet and Gain controls, out to Out L and Out R. Use it to modulate a stereo sound (or a different sound on each side) without collapsing the stereo image.
FM Operator
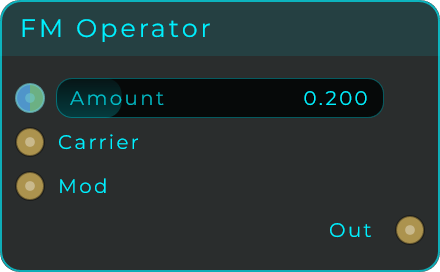
Frequency-modulates one audio signal with another. Feed your carrier sound into Carrier and a modulator (any oscillator or signal) into Mod, and the modulator pushes the carrier's pitch up and down very fast, adding sidebands and that classic FM edge. Both inputs are audio, so you build the sound from your own oscillators instead of a fixed one. The single Amount control sets how deep the modulation goes. Because the carrier runs through a short modulated delay, the node has a fixed latency of 15 ms. MNodes reports it to your DAW and delays the paths beside it to match, so a dry signal mixed with the operator's output stays in time.
| Parameter | Range | Default | Description |
|---|---|---|---|
| Amount | 0.0 - 1.0 | 0.2 | How deeply the modulator pushes the carrier. 0 passes the carrier through, higher adds more sidebands. |
Inputs: Carrier (audio, the sound to modulate), Mod (audio, the modulator), Amount (modulation depth, accepts a value or CV). Outputs: Out (audio, the modulated carrier).
PM Operator
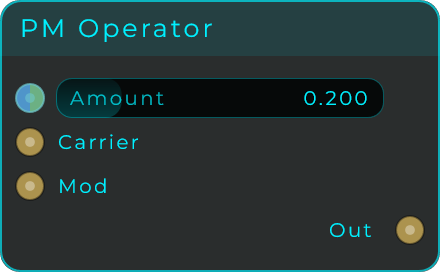
Phase-modulates one audio signal with another. It works like the FM Operator, but it shifts the carrier's phase rather than its frequency, which is the cleaner, DX-style flavour of FM and holds tuning more tightly. Feed your carrier into Carrier and a modulator into Mod (both audio), and dial in the depth with Amount. As with the FM Operator there is a fixed latency of 15 ms, since the carrier runs through a short modulated delay, and MNodes reports and compensates it the same way.
| Parameter | Range | Default | Description |
|---|---|---|---|
| Amount | 0.0 - 1.0 | 0.2 | How deeply the modulator shifts the carrier's phase. 0 passes the carrier through, higher adds more sidebands. |
Inputs: Carrier (audio, the sound to modulate), Mod (audio, the modulator), Amount (modulation depth, accepts a value or CV). Outputs: Out (audio, the modulated carrier).
Chorus
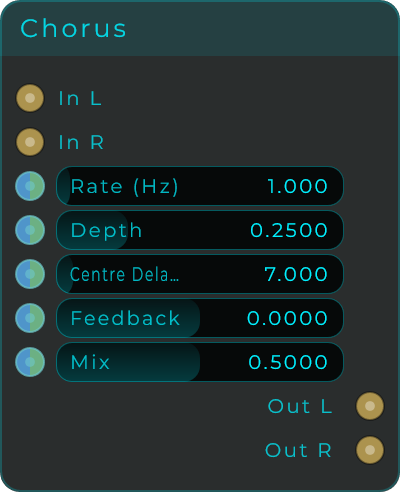
A stereo chorus that makes any sound feel fuller and wider, with a gentle shimmering wobble. It does this with a very short, constantly shifting delay spread across the stereo image, which adds width and movement to pads, guitars, vocals and synths.
| Parameter | Range | Default | Description |
|---|---|---|---|
| Rate | 0.0 - 20.0 Hz | 1.0 | How fast the internal LFO sweeps the delay. Slow rates drift; faster rates wobble |
| Depth | 0.0 - 1.0 | 0.25 | How far the LFO swings the delay. A little adds shimmer, a lot becomes warble |
| Centre Delay | 1.0 - 100 ms | 7.0 | Base delay time the modulation moves around. Longer values fatten and detune |
| Feedback | -1.0 - 1.0 | 0.0 | Recirculates the delayed signal for richer, flanger-like textures. Negative inverts phase |
| Mix | 0.0 - 1.0 | 0.5 | Balance between the dry signal and the wet chorus |
Inputs: In L, In R, plus Rate, Depth, Centre Delay, Feedback and Mix (all accept CV). Outputs: Out L, Out R.
Flanger
The jet-plane whoosh. It delays the sound by a tiny amount, sweeps that delay with an LFO and feeds the result back into itself. The very short delay puts a row of notches through the sound, the sweep moves them, and the feedback sharpens them until they ring. From a slow shimmer on a pad to a full metallic sweep on drums or guitars.

| Parameter | Range | Default | Description |
|---|---|---|---|
| Rate | 0.01 - 10 Hz | 0.3 | How fast the sweep moves. Very slow rates drift for minutes; a few Hz is the seasick end |
| Depth | 0.0 - 1.0 | 0.7 | How far the sweep travels from the Manual setting. At 0 the delay sits still and you get a fixed comb filter |
| Manual | 0.05 - 20 ms | 0.5 | The delay the sweep starts from, and the control that sets the character: under a millisecond is thin and metallic, a few milliseconds is closer to a chorus |
| Feedback | -0.95 - 0.95 | 0.6 | How much of the delayed sound goes back in. Positive sharpens the peaks, negative inverts the comb for the hollow version. Soft-clipped, so it cannot run away |
| Stereo Spread | 0 - 180 degrees | 90 | Phase offset of the LFO between left and right. 0 sweeps both together and stays mono-safe; 180 is the widest |
| Mix | 0.0 - 1.0 | 0.5 | Balance between the dry sound and the swept one. 0.5 is the classic full flange: a comb filter needs equal parts to notch properly |
| LFO Shape | Sine / Triangle | Sine | Sine sweeps smoothly through the turns; Triangle moves at a constant speed and turns sharply, closer to sweeping by hand |
Set Rate to its minimum and drive Manual from an envelope or another LFO to sweep the flanger by hand instead of letting it cycle.
Inputs: In L, In R, plus Rate, Depth, Manual, Feedback, Spread and Mix (all accept CV), and Shape. Outputs: Out L, Out R.
Phaser
The swirling, whooshing sweep of a phaser pedal. A chain of all-pass filters, mixed back with the original sound, cuts a row of notches into it, and an LFO slides the notches up and down. From a gentle swirl on keys and guitars to a thick, ringing sweep on pads and drums.
Needs: screenshot of the Phaser node on the graph.
| Parameter | Range | Default | Description |
|---|---|---|---|
| Mode | Free (Hz) / Sync | Free (Hz) | Free goes round at Rate. Sync goes round in time with the song, once every Cycle |
| Rate | 0.01 - 20 Hz | 0.4 | How many times a second the effect goes round, when Mode is Free |
| Cycle | 64 Bars - 1/128 | 1 Bar | How long one round lasts as a note length, when Mode is Sync. While the song plays, the rounds line up with its beats |
| Shape | Sine / Triangle | Sine | Sine slows down at the ends of the sweep; Triangle moves at a steady speed |
| Depth | 0.0 - 1.0 | 0.7 | How far the sweep travels each way from Centre: 0 holds the notches still, 1 is two octaves each way |
| Centre | 50 - 5000 Hz | 800 | The frequency the sweep moves around. Low sounds darker, high brighter |
| Feedback | -0.95 - 0.95 | 0.4 | How much of the result goes back in. Positive sharpens the sweep until it rings, negative gives a hollower tone |
| Stages | 2, 4, 6, 8, 12 | 4 | How many filters are in the chain; every two make one notch. 4 is the classic phaser, 12 the thickest |
| Mix | 0.0 - 1.0 | 0.5 | Blend of the untouched sound and the filtered one. 0.5 cuts the deepest notches; at 1 you hear only the filters, which on their own barely change the sound |
| Retrigger | Button | Starts the cycle again from its beginning |
Inputs: In, plus Rate, Depth, Centre, Feedback and Mix (all accept CV), and Mode, Cycle, Shape, Stages and Retrigger. Outputs: Out.
Phaser Stereo
The same phaser for a stereo pair: In L and In R come out as Out L and Out R, with the same controls. It adds Stereo Spread (0 - 180 degrees, 90 by default), which puts the right side's sweep ahead of the left's: 0 sweeps both sides together, and 180 sends them opposite ways for the widest sound. Spread takes CV like the other numbers.
Tremolo
The volume rising and falling over and over, like the tremolo on a guitar amp or an electric piano. An LFO, a slow wave, pulls the volume down and lets it back up. Square gives a choppy, gated sound.
Needs: screenshot of the Tremolo node on the graph.
| Parameter | Range | Default | Description |
|---|---|---|---|
| Mode | Free (Hz) / Sync | Free (Hz) | Free goes round at Rate. Sync goes round in time with the song, once every Cycle |
| Rate | 0.01 - 20 Hz | 4.0 | How many times a second the effect goes round, when Mode is Free |
| Cycle | 64 Bars - 1/128 | 1/8 | How long one round lasts as a note length, when Mode is Sync. While the song plays, the rounds line up with its beats |
| Shape | Sine, Triangle, Square, Ramp Up, Ramp Down | Sine | How the volume moves: Sine and Triangle rise and fall smoothly, Square jumps between loud and quiet, Ramp Up swells up through each cycle and Ramp Down fades away through it |
| Depth | 0.0 - 1.0 | 0.5 | How far the volume drops: 0 leaves it alone, 1 goes all the way to silence |
| Retrigger | Button | Starts the cycle again from its beginning |
For a rhythmic gate in time with the song, set Mode to Sync, Shape to Square and Depth to 1. Send an event into Retrigger with each note and every note starts at full volume.
Inputs: In, plus Rate and Depth (both accept CV), and Mode, Cycle, Shape and Retrigger. Outputs: Out.
Tremolo Stereo
The same tremolo for a stereo pair: In L and In R come out as Out L and Out R, with the same controls. It adds Stereo Spread (0 - 180 degrees, 0 by default), which puts the right side's wave ahead of the left's: at 0 both sides move together, and at 180 one side is loud while the other is quiet, so the sound moves from side to side like an auto-pan. Spread takes CV like the other numbers.
Vibrato
The pitch rising and falling around the note, like a singer's or a violinist's vibrato. An LFO, a slow wave, bends the pitch up and down. Mixed with the untouched sound, the same wobble becomes a chorus.
Needs: screenshot of the Vibrato node on the graph.
| Parameter | Range | Default | Description |
|---|---|---|---|
| Mode | Free (Hz) / Sync | Free (Hz) | Free goes round at Rate. Sync goes round in time with the song, once every Cycle |
| Rate | 0.01 - 20 Hz | 5.5 | How many times a second the effect goes round, when Mode is Free |
| Cycle | 64 Bars - 1/128 | 1/16 | How long one round lasts as a note length, when Mode is Sync. While the song plays, the rounds line up with its beats |
| Shape | Sine / Triangle | Sine | Sine bends smoothly; Triangle bends at a steady speed and turns sharply at the top and the bottom |
| Depth | 0 - 200 cents | 20 | How far the pitch bends each way. 100 cents is a semitone, and 10 to 30 is a natural vibrato |
| Mix | 0.0 - 1.0 | 1.0 | Blend of the untouched sound and the vibrato. 1 is only the vibrato; around 0.5 the two together sound like a chorus |
| Retrigger | Button | Starts the cycle again from its beginning |
The pitch is bent with a very short delay that speeds up and slows down, so the sound comes out a millisecond or two late. At very slow rates, below about a quarter of a Hz, a deep vibrato bends less than Depth asks, because bending that slowly would need a much longer delay.
Inputs: In, plus Rate, Depth and Mix (all accept CV), and Mode, Cycle, Shape and Retrigger. Outputs: Out.
Vibrato Stereo
The same vibrato for a stereo pair: In L and In R come out as Out L and Out R, with the same controls. It adds Stereo Spread (0 - 180 degrees, 0 by default), which puts the right side's wobble ahead of the left's: at 0 both sides move together, and more spreads the sound wider. Spread takes CV like the other numbers.
Wow & Flutter
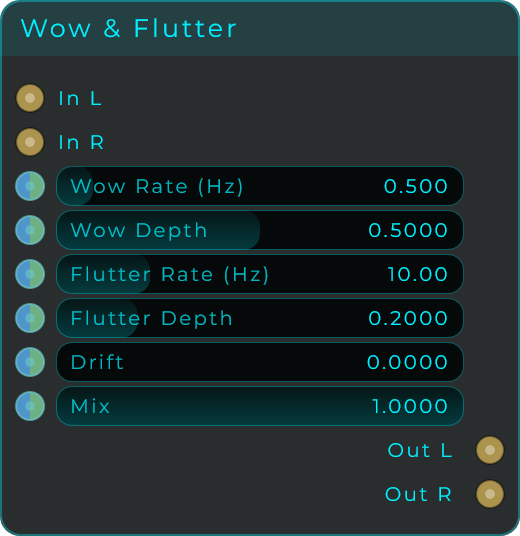
Recreates the unsteady, wavering pitch of an old, worn tape machine. It blends a slow wobble (wow), a faster shimmer (flutter) and a slow random drift, all gently bending the pitch. By default it plays only the processed sound, so it adds movement rather than thickening the tone.
| Parameter | Range | Default | Description |
|---|---|---|---|
| Wow Rate | 0.05 - 5.0 Hz | 0.5 | Speed of the slow LFO that simulates worn tape pulleys |
| Wow Depth | 0.0 - 1.0 | 0.5 | Amount of slow pitch wobble. Higher gives a more obvious tape-warp feel |
| Flutter Rate | 4.0 - 30.0 Hz | 10.0 | Speed of the fast LFO that simulates capstan and head vibration |
| Flutter Depth | 0.0 - 1.0 | 0.2 | Amount of fast pitch jitter. Small adds character, large adds nervous shimmer |
| Drift | 0.0 - 1.0 | 0.0 | Slow filtered-noise drift on top of the LFOs for long, unpredictable wandering |
| Mix | 0.0 - 1.0 | 1.0 | Balance between the dry signal and the modulated signal |
Inputs: In L, In R, plus Wow Rate, Wow Depth, Flutter Rate, Flutter Depth, Drift and Mix (all accept CV). Outputs: Out L, Out R.
Tape Damage
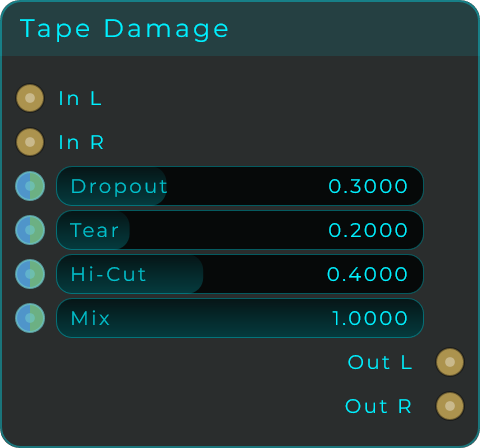
Makes a sound feel like it is playing back from a damaged tape. Random dropouts briefly cut the volume, random pitch tears cause quick momentary dives, and a high-cut control darkens the top end the way an old, worn tape would. By default it plays only the processed sound.
| Parameter | Range | Default | Description |
|---|---|---|---|
| Dropout | 0.0 - 1.0 | 0.3 | How often the level briefly drops out |
| Tear | 0.0 - 1.0 | 0.2 | Density and depth of momentary pitch tears |
| Hi-Cut | 0.0 - 1.0 | 0.4 | Darkens the top end (0 is bright, 1 is muffled) |
| Mix | 0.0 - 1.0 | 1.0 | Balance between the dry signal and the damaged signal |
Inputs: In L, In R, plus Dropout, Tear, Hi-Cut and Mix (all accept CV). Outputs: Out L, Out R.
Looper
A stereo looper that records, plays back and layers sound on top of itself (overdub). You build up a phrase using four playback controls: record it, play it, and add more layers over the top. The recorded loop is saved with your project, and a Phase output lets several loopers stay in sync with each other.
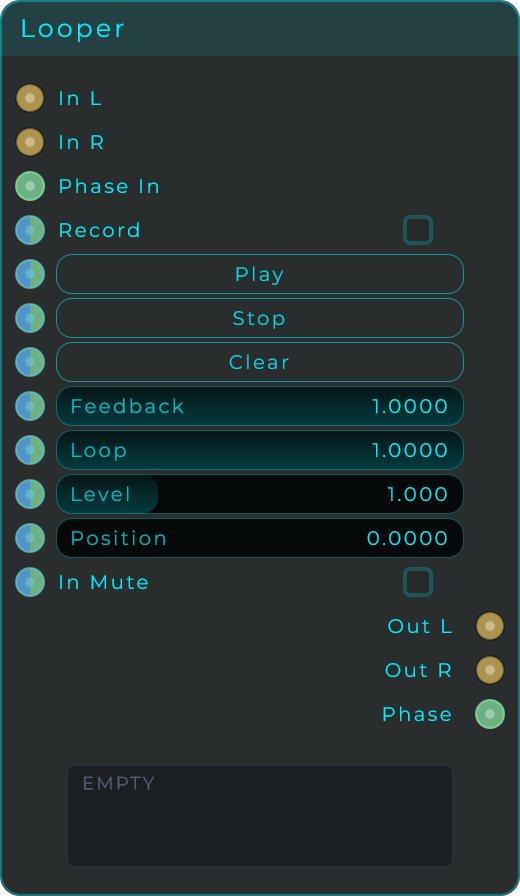
You control the looper with four pins (and matching buttons). Each one works in two ways at once: clicking the button triggers it, and a connected gate or control signal also triggers it the moment it rises. Record captures the first take, then switches to adding new layers on top. Play starts or resumes playback. Stop stops while keeping the loop. Clear erases the loop so you can start fresh.
After Rec decides where the first take goes the moment it closes, so you can go straight from recording into overdubbing without sending a second trigger at exactly the right time. It applies when the take closes by itself: on the Record toggle, on the buffer filling up, or on a master phase coming round. Pressing Play or Stop still does what it says.
| Parameter | Range | Default | Description |
|---|---|---|---|
| Length | 1 - 60 s | 30 | Maximum loop length. Inspector only, since changing it reallocates the buffer |
| After Rec | Play / Overdub / Stop | Play | Where the first take lands when it closes by itself |
| Feedback | 0.0 - 1.0 | 1.0 | How much of the previous loop survives an overdub pass. 1.0 keeps old layers, lower fades them |
| Loop | 0.0 - 1.0 | 1.0 | Loop volume. 0 mutes the loop, 1 is full level |
| Level | 0.0 - 4.0 | 1.0 | Output level applied to the looped audio |
| Position | 0.0 - 1.0 | 0.0 | Seek into the loop. Ignored while Recording or while Phase In is connected |
| Speed | 0.0 - 4.0 | 1.0 | Playback speed, tape style, so pitch follows. 2 is an octave up, 0.5 an octave down, 0 freezes the playhead |
| In Mute | On/Off | Off | Mutes the dry input so only the loop is heard |
| Reverse | On/Off | Off | Plays the loop backwards. Overdubbing while reversed lays the take down backwards too |
Speed sets the size of each step, not its direction, so it works alongside Reverse instead of against it, and it is ignored while Phase In is connected because the master owns the position there. Overdubbing at a speed other than 1 writes one sample per position the playhead visits: a slow pass lays a take over the old layer rather than eating it, and a fast one leaves gaps in the new take.
Inputs: In L, In R, Phase In, the Record / Play / Stop / Clear transport pins, plus After Rec, Feedback, Loop, Level, Position, Speed, In Mute and Reverse (all accept CV). Outputs: Out L, Out R, a Phase ramp (0..1) synced to the playhead, and Length, the recorded loop in seconds (0 when there is no loop). Length is what was actually recorded, not the Length setting, which is only the ceiling the buffer was sized for.
Beat Repeat
A slice repeater (stutter effect) that grabs short pieces of the incoming sound in time with the beat and repeats them. It records the input continuously; at every Interval it rolls the dice (Chance), and when the roll passes it captures a Grid-sized slice and plays it back several times in a row, with optional pitch drops, fades, reversals and accelerating rolls. The body shows a step timeline of the interval, the captured slice and each repetition as it fires.
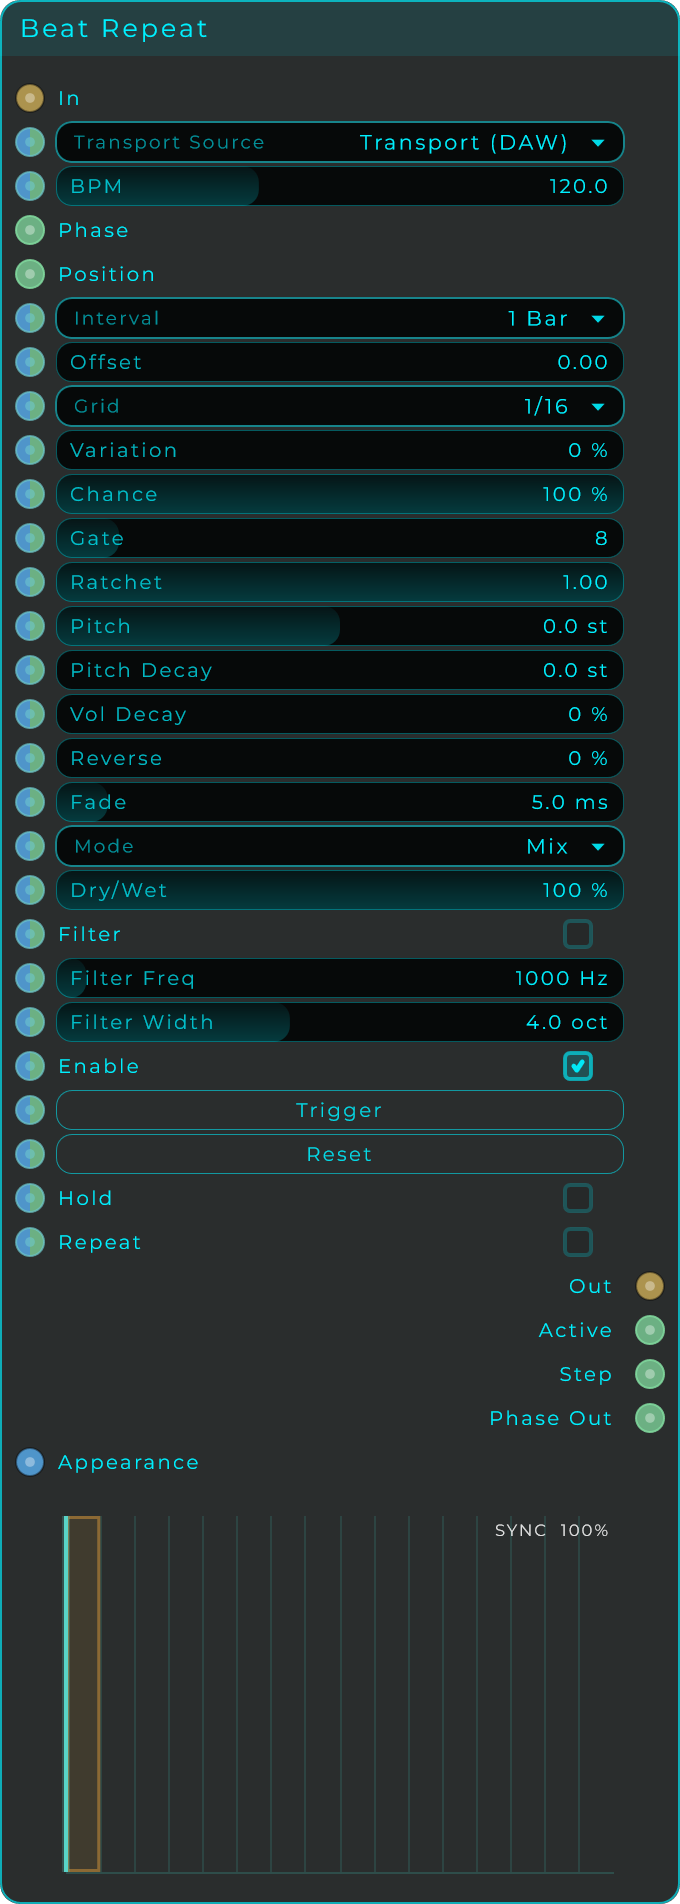
Timing follows a Transport Source: Internal runs the node's own clock from the BPM control, Transport (DAW) follows your project's tempo and position, and the two External modes lock to a ramp signal patched into Position or Phase, so several nodes can share one timeline. Two controls do the rhythmic work and are easy to mix up: Interval is how often a stutter can start, Grid is how long each repeated slice lasts.
| Parameter | Range | Default | Description |
|---|---|---|---|
| Transport Source | Internal / Transport (DAW) / External Position / External Phase | Transport (DAW) | Which clock drives the timing. Internal uses the BPM control; the External modes follow a ramp on the Position or Phase input |
| BPM | 20 - 300 | 120 | Tempo of the internal clock, used when Transport Source is Internal |
| Interval | Choice | 1 Bar | How often a repeat can start, as a musical note value. Each boundary rolls the Chance dice |
| Offset | 0.0 - 0.99 | 0.0 | Where inside the interval the capture starts. 0 is right on the boundary, 0.5 is halfway through |
| Grid | Choice | 1/16 | Length of one captured slice, as a musical note value. Smaller means shorter, faster stutters |
| Variation | 0 - 100 % | 0 | Randomises the slice length a little on every repeat, for unpredictable, glitchy rolls |
| Chance | 0 - 100 % | 100 | Probability that an interval actually starts repeating. 100 is every interval, 50 is about half |
| Gate | 1 - 64 | 8 | How many times the captured slice plays per burst |
| Ratchet | 0.25 - 1.0 | 1.0 | Multiplies the slice length on every repeat. Below 1 the stutter speeds up as it goes; 1.0 is off |
| Pitch | -48 - +48 st | 0 | Transposes the repeats, tape-style. Positive is up, negative is down |
| Pitch Decay | 0 - 12 st | 0 | Each repeat slides further down in pitch than the one before, for falling rolls |
| Vol Decay | 0 - 100 % | 0 | Each repeat gets quieter than the last, so the burst fades away |
| Reverse | 0 - 100 % | 0 | Chance that a repeat plays backwards |
| Fade | 0.5 - 50 ms | 5 | Short fade at the slice edges to avoid clicks |
| Mode | Mix / Insert / Gate | Mix | Mix adds the repeats on top of the dry sound, Insert replaces it while repeating, Gate outputs only the repeats |
| Dry/Wet | 0 - 100 % | 100 | Overall blend between the dry input and the effect |
| Filter | Off / On | Off | Bandpass filter applied to the repeats only, for the classic radio-style colour |
| Filter Freq | 50 - 18000 Hz | 1000 | Centre frequency of the repeat filter |
| Filter Width | 0.5 - 9 oct | 4 | Width of the repeat filter, in octaves |
| Enable | Off / On | On | Master on/off. Off lets the dry signal pass straight through |
| Hold | Off / On | Off | Freezes the current repetition and loops it until released |
| Repeat | Off / On | Off | Latch: every interval repeats, ignoring Chance |
Two buttons round it off: Trigger fires a repeat burst right now, ignoring Interval and Chance, and Reset restarts the pattern and re-aligns the clock. Both also work from their pins, so any signal or event can fire them.
Inputs: In, the Trigger and Reset pins, Phase and Position ramp inputs for the External modes, an Appearance pin, plus a pin for every parameter above (all accept CV). Outputs: Out, plus Active (a gate held high while repeating), Step (a pulse at the start of every repetition) and Phase Out (a 0..1 ramp for syncing other nodes).
Beat Repeat Stereo
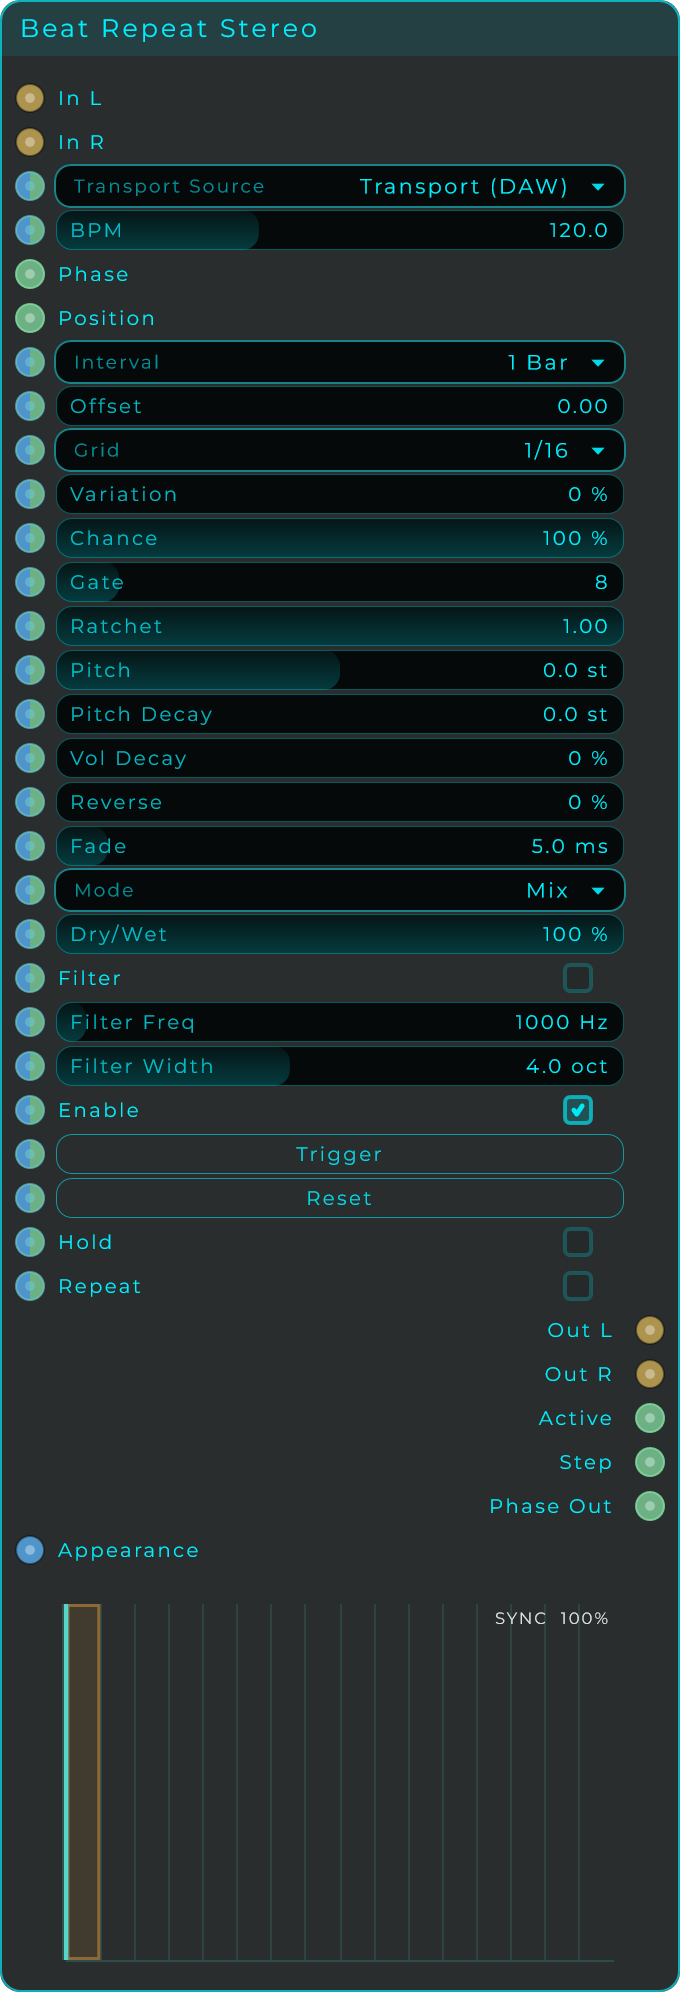
The same slice repeater for a stereo pair: In L and In R come out as Out L and Out R, with slices captured and repeated on both channels together. All the controls, the timeline display and the Active / Step / Phase outputs work exactly as above.
Unison
Adds slightly detuned, spread-out copies of any sound for instant thickness and width. It turns a thin mono synth or sample into a big, wide stereo sound, like several players performing the same part just slightly out of tune with each other.
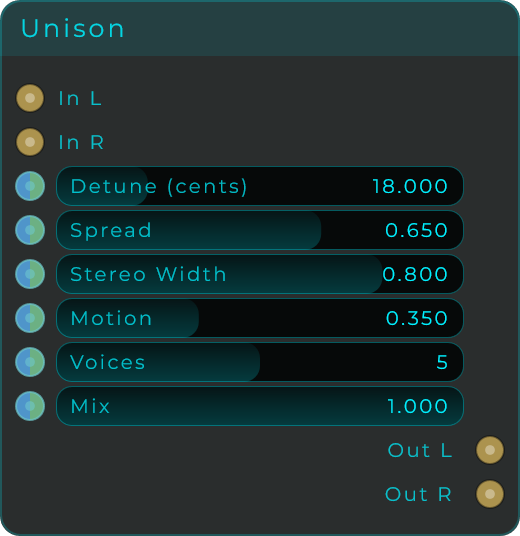
| Parameter | Range | Default | Description |
|---|---|---|---|
| Detune | 0 - 80 cents | 18 | How much the stacked voices are detuned from each other |
| Spread | 0.0 - 1.0 | 0.65 | How the voices are distributed around the centre |
| Stereo Width | 0.0 - 1.0 | 0.8 | Stereo opening of the voice fan |
| Motion | 0.0 - 1.0 | 0.35 | How much the unison moves and drifts over time |
| Voices | 1 - 9 | 5 | Number of stacked voices. More voices is thicker but heavier on CPU |
| Mix | 0.0 - 1.0 | 1.0 | Balance between the dry signal and the unison output |
Inputs: In L, In R (if In R is omitted, In L feeds both), plus Detune, Spread, Stereo Width, Motion, Voices and Mix (all accept CV). Outputs: Out L, Out R.
Pitch Shift
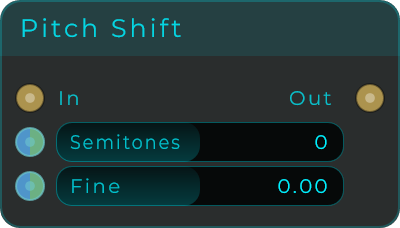
Shifts the pitch of incoming sound up or down on the fly, without any gaps in the audio. Use Semitones for big jumps and Fine for tiny tuning tweaks.
| Parameter | Range | Default | Description |
|---|---|---|---|
| Semitones | -48 - +48 st | 0 | Coarse transposition. 12 is one octave up, -12 one octave down |
| Fine | -100 - +100 cents | 0 | Fine tune in cents (1/100 of a semitone) for sub-semitone precision and detuning |
Inputs: In, plus Semitones and Fine (both accept CV). Outputs: Out.
Pitch Shift Stereo
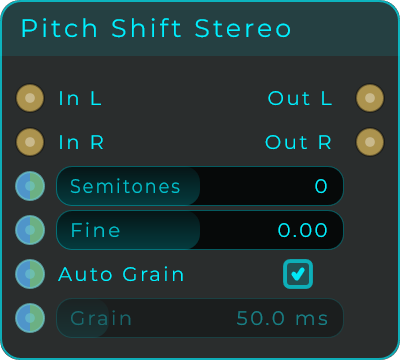
The same shifter for a stereo pair: In L and In R come out as Out L and Out R with identical Semitones and Fine controls. It adds a Grain control (with an Auto option) that sets the size of the little pieces used for shifting, so you can tune the character for drums, voices or pads.
Freq Shifter
Shifts every frequency in the sound up or down by a fixed number of Hz. That is not the same as a pitch shift: because every part of the sound moves by the same amount, the natural spacing between harmonics is broken and the tone turns metallic and bell-like. Small shifts of a few Hz give phaser-like movement and slow detune, and with some Feedback the shift is applied over and over for endlessly rising or falling barberpole effects; larger shifts give robotic, inharmonic tones.
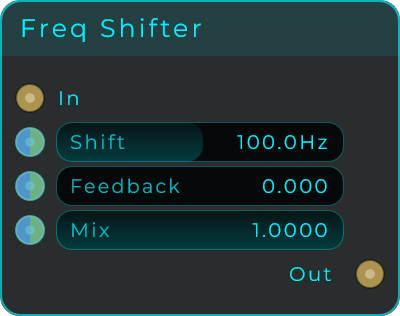
| Parameter | Range | Default | Description |
|---|---|---|---|
| Shift | -5000 - +5000 Hz | 100 | How far the whole spectrum moves. Positive shifts up, negative shifts down |
| Feedback | 0.0 - 0.95 | 0.0 | Sends the shifted sound back through the shifter for spiralling, barberpole textures |
| Mix | 0.0 - 1.0 | 1.0 | Balance between the dry input and the shifted output |
Inputs: In, plus Shift, Feedback and Mix (all accept CV). Outputs: Out.
Freq Shifter Stereo
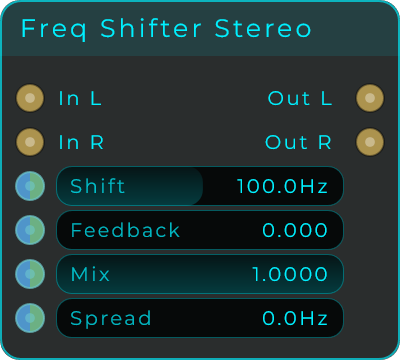
The same shifter for a stereo pair (In L/R to Out L/R), with both channels kept perfectly in step so the stereo image is preserved. It adds a Spread control (0 - 2000 Hz) that shifts the left and right channels in opposite directions for a wide, slowly rotating image; at 0 the channels stay locked.
Reverb
A stereo reverb that adds a sense of depth and space, like playing the sound in a room. It is fast to set up, easy on your computer, and a reliable first choice for vocals, drums and overall mixes.
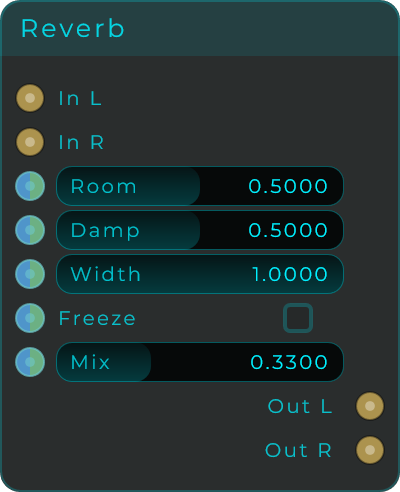
| Parameter | Range | Default | Description |
|---|---|---|---|
| Room | 0.0 - 1.0 | 0.5 | Virtual room size. Larger values create longer tails |
| Damp | 0.0 - 1.0 | 0.5 | High-frequency damping. Higher makes the tail darker |
| Width | 0.0 - 1.0 | 1.0 | Stereo width of the reverb |
| Freeze | On/Off | Off | Holds the current reverb tail indefinitely |
| Mix | 0.0 - 1.0 | 0.33 | Balance between the dry and wet signal |
Inputs: In L, In R, plus Room, Damp, Width, Freeze and Mix (all accept CV). Outputs: Out L, Out R.
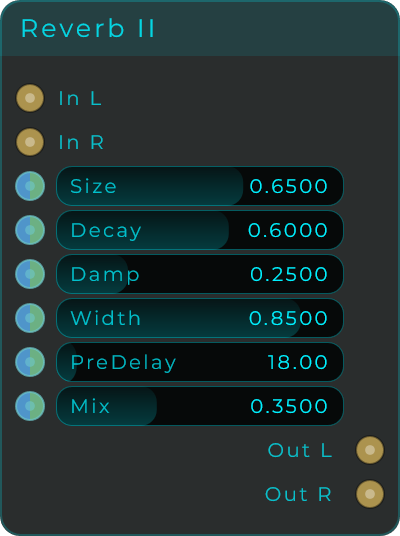
Reverb II
A second stereo reverb, based on well-known classic reverb designs. Its tail is denser and grainier than the first Reverb, and it adds a pre-delay control (a short gap before the reverb starts).
| Parameter | Range | Default | Description |
|---|---|---|---|
| Size | 0.0 - 1.0 | 0.65 | Virtual enclosure size. Larger is bigger and more diffuse |
| Decay | 0.0 - 1.0 | 0.60 | Length of the reverb tail |
| Damp | 0.0 - 1.0 | 0.25 | How quickly high frequencies fade inside the reverb |
| Width | 0.0 - 1.0 | 0.85 | Stereo width of the wet signal. 0 is mono, 1 is full stereo |
| PreDelay | 0 - 250 ms | 18 | Delay between the dry sound and the start of the reverb tail |
| Mix | 0.0 - 1.0 | 0.35 | Balance between the dry input and the wet reverb |
Inputs: In L, In R, plus Size, Decay, Damp, Width, PreDelay and Mix (all accept CV). Outputs: Out L, Out R.
TIP
Try both Reverb and Reverb II on the same source. They have different characters and one may suit your sound better than the other.
Convolver
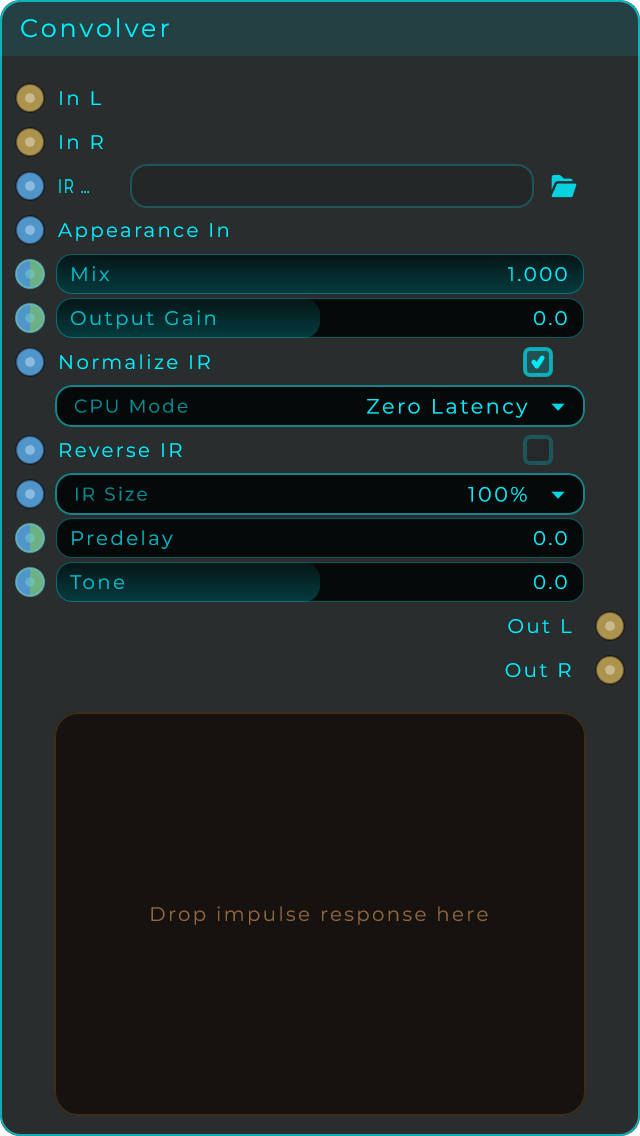
Places your sound inside a recorded space or speaker. Load an impulse response (a short audio file that captures how a room, hall, plate or guitar cabinet responds) by dropping the file onto the node or using the file picker, and the Convolver plays your sound through it: real reverbs, cab and amp tones, or creative colours from any audio file. The body shows the loaded impulse waveform and can sit on the front panel.
| Parameter | Range | Default | Description |
|---|---|---|---|
| IR File | File | (empty) | The impulse response to load (WAV, AIFF or FLAC, up to 60 seconds) |
| Mix | 0.0 - 1.0 | 1.0 | Balance between dry and processed. Starts fully wet, ready for cab and amp impulses |
| Output Gain | -24 - +24 dB | 0 | Output level trim |
| Normalize IR | On/Off | On | Keeps loaded impulses at a consistent loudness. Turn off to keep a file's own level |
| CPU Mode | Zero Latency / Low CPU | Zero Latency | Zero Latency is best for cabs and short impulses; Low CPU is much lighter for long reverb impulses and reports its small latency to the host |
| Reverse IR | On/Off | Off | Plays the impulse backwards for reversed-reverb swells |
| IR Size | 50% / 75% / 100% / 150% / 200% | 100% | Stretches or shrinks the impulse in time, making the space smaller or bigger |
| Predelay | 0 - 250 ms | 0 | Short gap before the processed sound starts |
| Tone | -100 - +100 | 0 | Tilts the processed sound darker (negative) or brighter (positive) |
Inputs: In L, In R, IR File (a file path), plus Mix, Output Gain, Predelay and Tone (all accept CV), Normalize, Reverse and IR Size (values), and an Appearance pin. Outputs: Out L, Out R.
Delay Mono
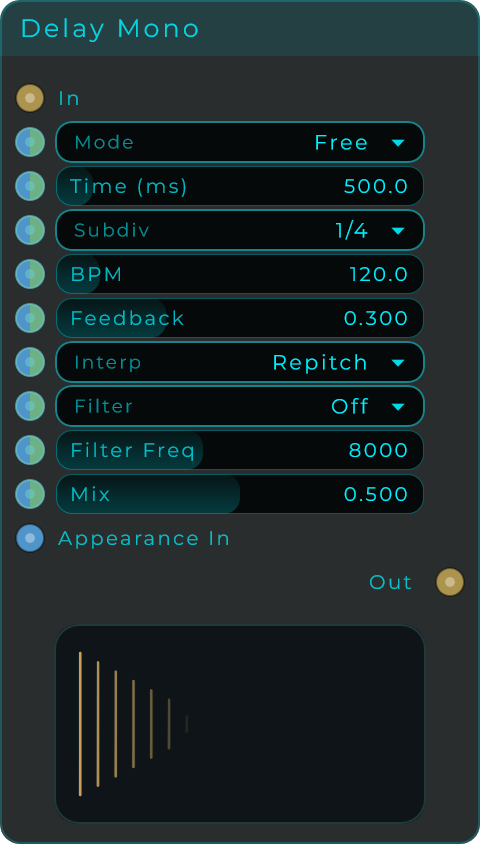
A mono echo. You can set the time freely or lock it to your song's tempo, shape the repeats with a filter, and choose how the sound behaves when you change the time (a smooth blend, or a tape-style pitch slide). Great for echoes, slapback and rhythmic repeats.
| Parameter | Range | Default | Description |
|---|---|---|---|
| Mode | Free / Sync | Free | Free uses the Time in ms; Sync derives the time from BPM and a subdivision |
| Time | 0.1 - 5000 ms | 500 | Delay time in milliseconds, used in Free mode |
| Subdiv | Choice | 1/4 | Musical subdivision used in Sync mode (1/64 up to longer, with triplet and dotted variants) |
| BPM | 1 - 999 | 120 | Tempo used by Sync mode. Set manually or follow a Transport node |
| Feedback | 0.0 - 1.0 | 0.3 | How much of the delayed signal feeds back. Soft-clipped to stay safe |
| Interp | Crossfade / Repitch | Repitch | How time changes are handled. Crossfade keeps pitch steady; Repitch allows tape-style slides |
| Filter | Off / LP / HP / BP | Off | Filter inserted in the feedback path |
| Filter Freq | 20 - 20000 Hz | 8000 | Cutoff or centre frequency of the feedback filter |
| Mix | 0.0 - 1.0 | 0.5 | Balance between the dry input and the delayed output |
| Clear | button | - | Empties the delay line. Everything still going round in the feedback stops, without waiting for it to die away and without touching your settings. A short fade comes first, so it does not click |
Inputs: In, plus Time, Feedback, Mix, BPM, Filter Freq, Mode, Subdiv, Interp and Filter Type (all accept CV), and Clear, which accepts both: any message empties it, so an event or a Once at load works, and a CV stream empties it on every rising edge, so a gate or a trigger works too. Outputs: Out.
Delay Stereo
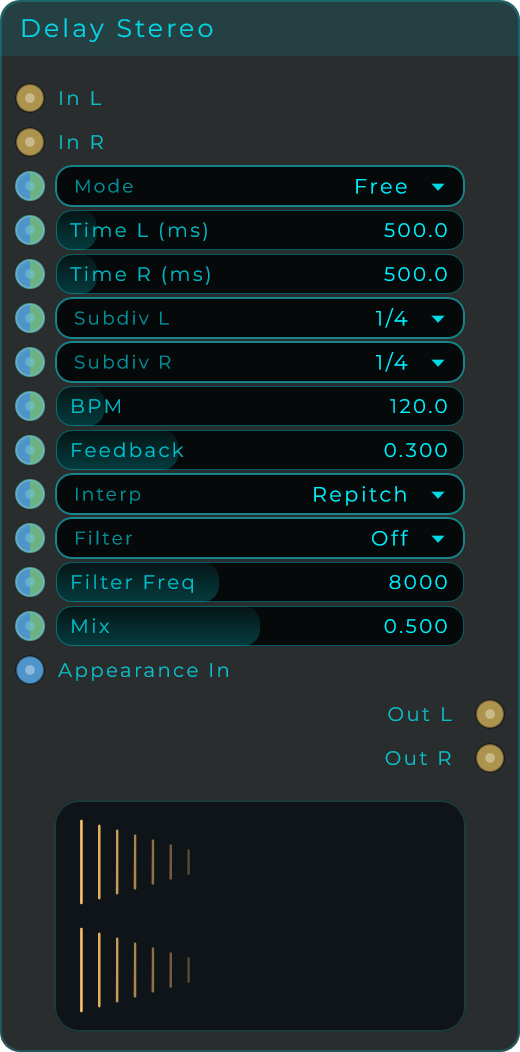
A stereo echo with separate times for the left and right sides, so each side can have its own rhythm. It also offers ping-pong and cross-feedback routing (echoes that bounce between the two sides), tempo sync, a filter on the repeats, and a choice between a smooth blend or a tape-style pitch slide when the time changes. Great for wide, spacious echoes.
| Parameter | Range | Default | Description |
|---|---|---|---|
| Mode | Free / Sync | Free | Free uses Time L and Time R in ms; Sync derives the times from BPM and per-channel subdivisions |
| Time L | 0.1 - 5000 ms | 500 | Delay time of the left channel, used in Free mode |
| Time R | 0.1 - 5000 ms | 500 | Delay time of the right channel, used in Free mode |
| Subdiv L | Choice | 1/4 | Left-channel subdivision used in Sync mode |
| Subdiv R | Choice | 1/4 | Right-channel subdivision used in Sync mode |
| BPM | 1 - 999 | 120 | Tempo used by Sync mode |
| Feedback | 0.0 - 1.0 | 0.3 | How much of the delayed signal feeds back. Soft-clipped to stay safe |
| Interp | Crossfade / Repitch | Repitch | How time changes are handled. Crossfade keeps pitch steady; Repitch allows tape-style slides |
| Filter | Off / LP / HP / BP | Off | Filter inserted in the feedback path |
| Filter Freq | 20 - 20000 Hz | 8000 | Cutoff or centre frequency of the feedback filter |
| Mix | 0.0 - 1.0 | 0.5 | Balance between the dry input and the delayed output |
| Clear | button | - | Empties both delay lines. Everything still going round in the feedback stops, without waiting for it to die away and without touching your settings. A short fade comes first, so it does not click |
Inputs: In L, In R, plus Time L, Time R, Feedback, Mix, BPM, Filter Freq, Mode, Subdiv L, Subdiv R, Interp and Filter Type (all accept CV), and Clear, which accepts both: any message empties it, so an event or a Once at load works, and a CV stream empties it on every rising edge, so a gate or a trigger works too. Outputs: Out L, Out R.
Vocoder
The classic "talking synth" effect. It listens to one sound (the modulator, usually a voice), splits it into up to 16 frequency bands, tracks how loud each band is, and then shapes a second sound (the carrier) to match. Plug a synth into Carrier In for the classic robot-voice sound, or leave it empty to use the built-in tone.
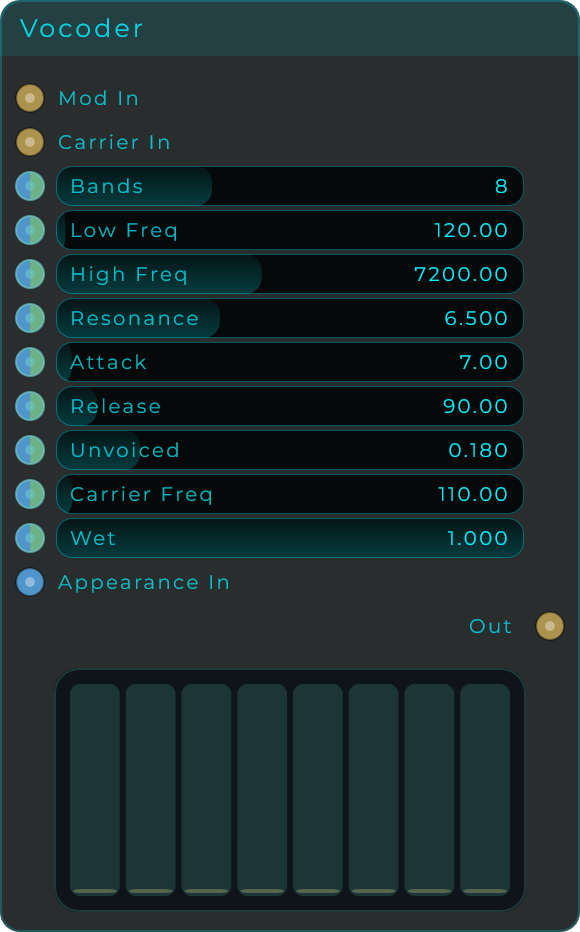
| Parameter | Range | Default | Description |
|---|---|---|---|
| Bands | 4 - 16 | 8 | Number of analysis and synthesis filter bands |
| Low Freq | 40 - 4000 Hz | 120 | Frequency of the lowest band |
| High Freq | 300 - 16000 Hz | 7200 | Frequency of the highest band |
| Resonance | 0.3 - 18.0 | 6.5 | Filter resonance. Higher is sharper and more robotic |
| Attack | 0 - 200 ms | 7 | Envelope follower attack speed |
| Release | 2 - 1000 ms | 90 | Envelope follower release speed |
| Unvoiced | 0.0 - 1.0 | 0.18 | Amount of noise mixed in for consonant detail |
| Carrier Freq | 40 - 2000 Hz | 110 | Internal carrier oscillator frequency, used when no external carrier is patched |
| Wet | 0.0 - 1.0 | 1.0 | Balance between the dry carrier and the vocoded output |
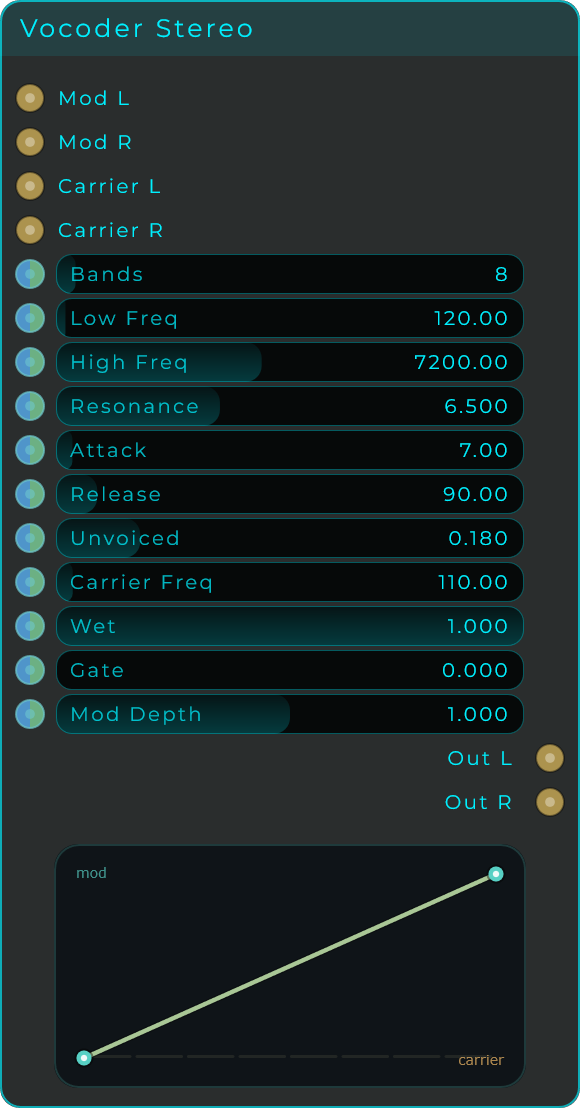
| Mod Depth | 0.0 - 2.0 | 1.0 | Spectral contrast: how strongly the voice shapes the carrier. 1 behaves as before, above 1 exaggerates the differences between bands for a more pronounced, talky character, below 1 flattens them, and 0 lets the carrier through almost unshaped |
Inputs: Mod In, optional Carrier In, plus Bands, Low Freq, High Freq, Resonance, Attack, Release, Unvoiced, Carrier Freq, Wet and Mod Depth (all accept CV). Outputs: Out.
Vocoder Stereo
A true-stereo vocoder with separate Mod L/R and Carrier L/R inputs and an independent set of filter bands for each channel, so wide sources stay wide. It goes up to 100 bands and adds a Gate control that silences the quietest bands for a cleaner, more articulate result.
Spectral Resonator
Makes the incoming sound ring through a tuned harmonic series, worked out in the spectrum rather than with filters: the signal is analysed into over a thousand narrow bands, and only the bands sitting near the harmonics of the target note resonate, with tails up to twenty seconds, while everything between the harmonics passes through dry. Feed it percussion and it turns hits into pitched shimmer; feed it a pad and it pulls the pad towards a chord's root; feed it noise and it plays the noise like a string.
Needs: screenshot of the Spectral Resonator node on the graph.
| Parameter | Range | Default | Description |
|---|---|---|---|
| Freq | 20 - 2000 Hz | 110 | Fundamental of the harmonic series. A note on the MIDI pin overrides it until you move the control again. |
| Decay | 0.05 - 20 s | 4 | Ring time: how long a harmonic takes to fall 60 dB. |
| Partials | 1 - 64 | 16 | How far up the harmonic series the resonance reaches. |
| Brightness | 0 - 1 | 0.5 | Tilt of the upper harmonics: low keeps only the body, high lets the top of the series ring too. |
| Stretch | -1 - 1 | 0 | Bends the series sharp (positive, piano-like) or flat (negative). |
| Mix | 0 - 1 | 0.35 | Dry/wet blend. |
Inputs: In L, In R (audio), MIDI (the last note played becomes the fundamental, with a short glide), Freq, Decay, Partials, Brightness, Stretch, Mix (each takes a value or a CV stream), and Appearance (JSON to restyle the body). Outputs: Out L, Out R.
The body draws one bar per harmonic. Drag across the bars to set each harmonic's level by hand, the way you draw partials on the Additive, and they multiply with Brightness, so you can carve odd-only combs, vowel-ish formant clumps or a single lonely 7th harmonic. While the resonator rings, a glow rises inside each bar showing how loudly that harmonic is sounding right now. The body drops onto the front panel like any widget, and its colours are yours through Appearance.
Play notes into the MIDI pin and the resonator retunes to what you play, which is the fastest way to use it musically: route your keyboard both into a synth and into the resonator sitting after a drum loop, and the loop starts following your chords. The analysis adds a fixed latency of about 32 ms at 48 kHz, which the graph's delay compensation reports to your DAW.
Spectral Morph
Two sources in, one hybrid out, and that is not the same thing as a crossfade. A crossfade plays both and you hear both; halfway through it is simply two sounds at once. This takes each source apart into the two things a spectrum is made of and blends them separately, so halfway is a sound that is neither.
Needs: screenshot of the Spectral Morph node on the graph, with the pad off the diagonal.
| Parameter | Range | Default | Description |
|---|---|---|---|
| Shape | 0.0 - 1.0 | 0.5 | The spectral envelope, from A at 0 to B at 1: the broad curve of where the energy sits, the resonances, the formants. |
| Detail | 0.0 - 1.0 | 0.5 | The fine structure inside that envelope, from A at 0 to B at 1: the harmonics, the noise between them, the grain. |
| Amount | 0.0 - 1.0 | 1.0 | How far into the morph. At 0 this is an ordinary equal-power crossfade driven by Shape. |
| Bands | 8 - 128 | 32 | How finely the envelope is measured, in log-spaced bands. |
| Phase | Strongest, From A, From B, Blend | Strongest | Where the output's phase comes from. |
| Transients | 0.0 - 1.0 | 0.5 | How much of an attack passes without being morphed. |
| Output | -24 to 24 dB | 0 dB | Level after the whole thing. |
In the Appearance you can turn off either half of the display, the pad's guides, or its labels, and set the colour of everything: a node on a front panel is often there for one job, and the half that does the other one is then just in the way.
Shape is what makes a vowel a vowel. It is the broad curve of the spectrum: the resonances, the formants, the shape of the box the sound came out of. Detail is what lives inside that curve: the harmonic comb, the noise between the harmonics, the grain that makes a bowed note a bowed note rather than a blown one.
The corners are the point. Set Shape and Detail to the same value and you walk the diagonal of the pad, which is the ordinary spectral interpolation everybody knows. Pull them apart and you get A's formants carrying B's harmonics, or the other way round: a sound neither source contains and no fader can reach. That is why the body has a pad with two axes instead of one slider, and why dragging it is the way to use this node. Double-click the pad to put it back in the middle.
Bands decides how hard the two axes pull apart. Few bands means broad, vowel-like formants and a strong split between shape and detail. Many bands means the envelope hugs the spectrum so closely that there is almost nothing left over to be detail, and the two axes start doing the same job.
Phase is a choice because phase cannot be interpolated. It wraps, and halfway between two unrelated angles is not halfway between two sounds. Strongest gives each partial to whichever source owns it, which keeps the result solid and is right nearly always. Partial and not band: the analysis window spreads one partial over three or four bands, and handing those to different sources cuts it in half between two unrelated phases, which is the underwater sound spectral processing is famous for. From A and From B nail the phase to one source, which is the classic cross-synthesis sound. Blend really does interpolate the angle, and smears.
Transients is the one thing a morph cannot do well. An attack is spread over the analysis window and rebuilt from a magnitude averaged across it, so a hit arrives soft. Where a frame is much louder than the ones before it, the morph steps aside for a moment and the plain crossfade passes instead. The body of the sound is still morphed; only the edge is let through. Turn it down for the smeared, washed sound; turn it up to keep drums hitting.
Everything is done in the log domain, because level is logarithmic to the ear: a halfway morph sits halfway in dB rather than being dragged around by whichever source is louder. It also means a band that is silent in one source pulls the result quiet there, and that intersection is a large part of what makes a morph sound like a morph rather than a mix. The output is then scaled back to the loudness the two inputs suggest, so sweeping the pad is not a volume ride.
With only one source connected it passes that source through: silence on one side is not the same as nothing being plugged in.
The display draws all three spectra: A and B thin behind, the result filled in front. It is the fastest way to see why a setting sounds the way it does.
The envelope is measured as the RMS inside each band, which follows the peaks of a spectrum rather than the valleys between its harmonics. That matters: an envelope pulled down into the valleys leaves half the harmonic structure sitting inside it, where Shape moves it, instead of in the fine structure, where Detail does, and the two axes stop meaning what they say.
Inputs: A L, A R, B L, B R (audio), Shape, Detail, Amount (each takes a value or a CV stream), Bands, Phase, Transients, Output, Appearance. Outputs: Out L, Out R.
It costs 2048 samples of latency, reported to your DAW through the graph's delay compensation: the analysis window, plus one hop that source A is held back by so its frame and B's cover the same instant.
Spectral Scale
Snaps audio to a scale: every band of the spectrum is weighted by how close its pitch sits to the nearest allowed note, in any octave, and everything out of key is filtered away. Whatever you feed it comes out harmonic with the key: a noisy texture turns into a chord bed, a detuned loop locks to the song, a synth line gets its passing dissonances shaved off.
Needs: screenshot of the Spectral Scale node on the graph.
| Parameter | Range | Default | Description |
|---|---|---|---|
| Root | C - B | C | Key root. |
| Scale | scale list | Major | The allowed notes; the same scale list the MIDI nodes use. |
| Amount | 0 - 1 | 1 | How strongly out-of-key energy is removed. |
| Width | 5 - 100 cents | 35 | Slack around each allowed note before a band counts as out of key: tight is surgical, wide is gentle. |
| Color | 0 - 10 s | 0 | Ring time of the in-key notes; 0 is a pure filter, above it the key starts to sustain and bloom. |
| Transients | 0 - 1 | 0.5 | How much of each attack passes unprocessed, so drums keep their hit. |
| Mix | 0 - 1 | 1 | Dry/wet blend. |
Inputs: In L, In R (audio), MIDI (hold a chord and the chord replaces the scale for as long as you hold it), and Root, Scale, Amount, Width, Color, Transients, Mix (each takes a value or a CV stream). Outputs: Out L, Out R.
Holding notes on the MIDI pin turns it into a playable harmonic filter: feed it a pad or a texture and play chords into the pin, and the audio follows your hands. Below about 30 Hz bands pass untouched, since pitch stops meaning anything down there. The analysis adds a fixed latency of about 32 ms at 48 kHz, reported to your DAW through the graph's delay compensation.
Stretch
Stretches sound out in time without moving its pitch, which is how you turn a short sample into a long pad or a drum loop into a wash of texture. At a Stretch of 1 the sound passes at its normal speed; push it up and the material is spread over a longer and longer time, until at extreme settings it stops sounding like the original and becomes an evolving surface.
Freeze holds the playhead where it is and keeps sounding it, so any moment of the input can be frozen into a sustained tone. Jitter randomises the grain positions a little, which trades a metallic, repeating quality for a softer, blurrier one, and is usually what you want on anything held for a long time.
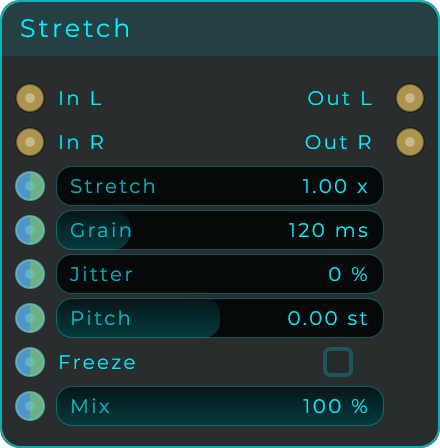
| Parameter | Range | Default | Description |
|---|---|---|---|
| Stretch | 1 - 100 x | 1 | How far the sound is spread out in time. 1 is normal speed |
| Grain | 10 - 500 ms | 120 ms | Size of the pieces used to rebuild the sound. Short is tighter, long is smoother |
| Jitter | 0 - 100 % | 0 | Randomises grain positions, trading a metallic repeat for a blurrier texture |
| Pitch | -24 - +24 semitones | 0 | Shifts pitch on top of the stretch |
| Freeze | On / Off | Off | Holds the playhead in place and sustains that moment |
| Mix | 0 - 100 % | 100 % | Balance between the dry input and the stretched signal |
Inputs: In L, In R (audio), plus the controls above accept CV Outputs: Out L, Out R (audio)