
Appearance
MIDI
MIDI is the language that carries notes, control movements and timing around your patch. Think of it as the performance instructions ("play this note, this loud, for this long") rather than the sound itself. The MIDI nodes work with that data: some bring MIDI in from your music software or keyboard and send it back out, others reshape notes by moving them up or down, fitting them to a key, building chords or turning held notes into running patterns, and a few create fresh patterns or convert control movements to and from CV (the internal signal MNodes uses to move knobs and modulate sound). Most controls double as inputs, so you can drive them from elsewhere in the patch. The note-changing nodes also keep careful track of which notes are being held, so changing a setting in the middle of a note never leaves a note ringing forever.
When several MIDI messages happen at exactly the same moment, the controls (CC, Program Change, pitch bend and channel pressure) always go before the notes that start at that moment, wherever they come from. A program change or a CC sent together with a chord is already in place when the chord arrives.
MIDI In
This is where MIDI enters your patch. In plugin mode it picks up everything coming from your music software (your DAW), and in standalone mode it picks up everything from your connected MIDI keyboard or controller. Every kind of message on the track comes through: notes, knob and slider movements (CC), pitch bend, the tempo clock and more.
Inputs: none. Outputs: In (all MIDI messages from the host).
MIDI Out
This is where MIDI leaves your patch and goes back to your music software. Use it to record what your patch is playing, send notes to other plugins, or play external hardware instruments.
Inputs: Out (MIDI messages to send to the host). Outputs: none.
MIDI Keyboard
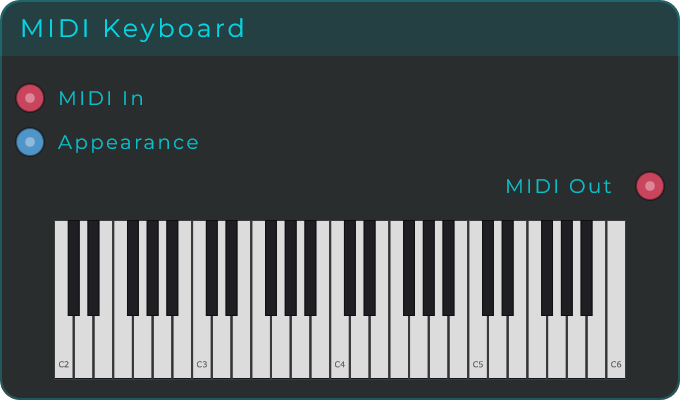
A playable piano keyboard built right into the node. Click or drag across the keys to play notes. Any MIDI coming in is passed along too, blended together with the notes you play by hand. With Hold turned on, both the keys you click and the notes coming in stay on until you trigger them again, instead of only sounding while pressed.
| Parameter | Range | Default | Description |
|---|---|---|---|
| Hold | On / Off | Off | When on, notes latch (toggle on/off) instead of behaving momentarily. Turning it off releases latched notes. |
| Channel | 1 to 16 | 1 | Output channel for notes played from the keyboard UI. Does not rewrite incoming MIDI channels. |
| Min Note | 0 to 126 | 48 | Lowest visible note of the keyboard range. |
| Max Note | 1 to 127 | 84 | Highest visible note of the keyboard range. |
How hard a clicked note sounds (its velocity) depends on where you click: clicking lower on a key plays it louder. Hold, Channel, Min Note and Max Note can be set right on the node or driven from inputs. There is also an Appearance input that takes a small block of JSON text so you can change the key labels and colours.
Inputs: MIDI In, Hold, Channel, Min Note, Max Note, Appearance (JSON). Outputs: MIDI Out (incoming MIDI merged with the notes you play).
MIDI Monitor
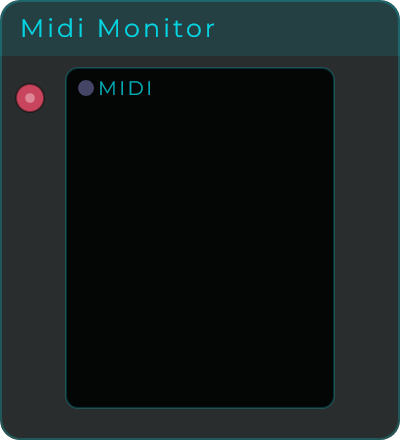
A live, scrolling readout of every MIDI message flowing through. It shows note presses and releases, knob and slider movements (CC), pitch bend, timing and more as they happen, which makes it the first node to grab when your MIDI is not doing what you expect.
| Parameter | Range | Default | Description |
|---|---|---|---|
| Freeze | Off / On | Off | Stops the list dead so you can read it while MIDI is still arriving. |
| Clear | button | Empties the list. | |
| Channel | All, 1 to 16 | All | Watch one channel only. |
| View | List, Latest | List | The list answers "what has been going past", which is what you want while hunting something down. Latest puts the single most recent message across the whole node, which reads from the other side of the room while you are checking a pad or a footswitch. |
| Newest | Top, Bottom | Top | Which end new messages arrive at. Bottom is how most other MIDI monitors do it, and it also means the newest line is always in the same place, so nothing has to be scrolled to keep up. |
| Show Time | Off / On | Off | Adds the gap since the previous message to each line. |
| Text Size | 8 to 48 | 18 | Bigger for Latest, smaller to fit more lines in. On a node too narrow for the size you pick, the text is drawn smaller so the longest line fits, never squeezed: widen the node to get the full size. |
What gets recorded. Under Show there is a switch per kind of message: Notes, CC, Pitch Bend, Aftertouch, Program, and Clock / SysEx. These decide what goes IN rather than what is drawn, because one node sending poly aftertouch fills the whole list in a fraction of a second and buries everything else. Clock / SysEx is off to begin with for exactly that reason.
Inputs: MIDI (the stream to monitor), Freeze, Clear, Channel. Outputs: none.
MIDI Note Trigger
Turns a simple trigger (a quick "go" signal) into an actual MIDI note with a pitch, loudness, length and channel you choose. It is the bridge between trigger-style logic and instruments that expect notes: the note starts the moment the trigger fires and ends after the time you set in Length (measured in milliseconds, where 1000 ms is one second).
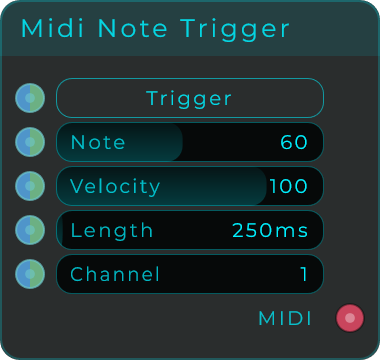
| Parameter | Range | Default | Description |
|---|---|---|---|
| Note | 0 to 127 | 60 | MIDI note number to play. |
| Velocity | 1 to 127 | 100 | Velocity used for the note. |
| Length | 1 to 10000 ms | 250 ms | How long the note stays on before it is released. |
| Channel | 1 to 16 | 1 | MIDI channel for the generated note. |
The Trigger fires from a click, from an Event, or from any incoming value of 0.5 or higher. Note, Velocity, Length and Channel can also be driven from inputs.
Inputs: Trigger, Note, Velocity, Length, Channel. Outputs: MIDI (the generated note).
MIDI Panic
The emergency stop for stuck notes. Click the button or send it a trigger and it sends a full rescue sequence on every channel at once: it lets go of the Sustain, Sostenuto and Hold 2 pedals, sends a note-off for every possible note, recentres the pitch bend, then fires All Sound Off, All Notes Off and Reset All Controllers. In short, if a note is hanging and will not stop, this clears it.
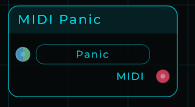
| Parameter | Range | Default | Description |
|---|---|---|---|
| Panic | Button / trigger | n/a | Click, or send an Event or rising trigger, to broadcast the panic messages on all 16 channels. |
Inputs: Trigger (fires the panic). Outputs: MIDI (the panic messages on every channel).
MIDI Program Change
Sends a MIDI Program Change, with an optional Bank Select in front of it, to switch the preset of whatever sits downstream: a plugin in a Plugin Host that answers to program changes, or a hardware synth on a MIDI Out. Set the program and, if the instrument wants one, the bank; the message goes out the moment Program changes, or when you click Send or fire its input. Everything arriving on MIDI In passes through, so the node sits in the middle of a chain.
| Parameter | Range | Default | Description |
|---|---|---|---|
| Program | 1 to 128 | 1 | The program to select, numbered the way instruments print it. |
| Bank MSB | -1 to 127 | -1 | Bank Select MSB (CC 0), sent before the program. -1 sends none. |
| Bank LSB | -1 to 127 | -1 | Bank Select LSB (CC 32), sent before the program. -1 sends none. |
| Channel | 1 to 16 | 1 | MIDI channel of the messages. |
| Send on Change | On / Off | On | Send as soon as Program or a bank changes. Off, only Send fires it. |
| Send | Event | Send the bank and program now. |
A plugin has to answer. VST3 has no program change of its own: the Plugin Host hands the message to the plugin byte for byte, and the plugin does with it what its maker decided, which for many is nothing. The ones that publish a program list, or map program change to a preset parameter, switch. For a plugin that ignores it, capture its presets in a States node instead, which recalls the whole plugin state by MIDI or CV. Hardware synths honour program change universally.
Inputs: MIDI In, Send, Program, Bank MSB, Bank LSB, Channel, Send on Change. Outputs: MIDI Out (the passthrough MIDI plus the bank and program change).
MIDI Octave
Moves incoming notes up or down by whole octaves (steps of twelve, so the same note name but higher or lower), while letting everything that is not a note pass straight through. Notes that are already being held keep the shift they started with, so nudging the control while a note is down never leaves it stuck.
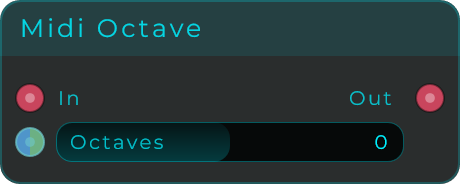
| Parameter | Range | Default | Description |
|---|---|---|---|
| Octaves | -4 to +4 | 0 | Octaves to shift. +1 moves up 12 semitones, -1 down 12, 0 passes through. |
The Octaves control can be set on the node or driven from an input.
Inputs: MIDI In, Octaves. Outputs: MIDI Out (octave-shifted MIDI).
MIDI Chord
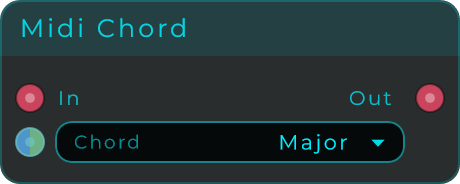
Turns each single note you play into a full chord built on that note. The chord shape you pick is stacked on top of whatever note comes in, so the same shape follows you to every key. Anything that is not a note passes through, and the node keeps track of overlapping chord notes so they all release correctly.
| Parameter | Range | Default | Description |
|---|---|---|---|
| Chord | Built-in chord types | First chord in the list | Chord shape applied above each incoming note. |
The Chord control can be set on the node or driven from an input.
Inputs: MIDI In, Chord. Outputs: MIDI Out (chord-expanded MIDI).
MIDI Delay
Holds the notes back and lets them out later. Nothing else happens to them: they keep their velocity, their pitch and their length, and the only thing that changes is when.
Most of the time what you want it for is lining up parts that do not arrive together. A hosted plugin with lookahead, or a sampler that takes a moment to speak, lands behind everything else in the patch; hold the fast parts back by the same amount and they play as one again. The other everyday use is deliberate: twenty or thirty milliseconds puts a layer behind the beat, which is what a drummer does and a sequencer never does on its own.
| Parameter | Range | Default | Description |
|---|---|---|---|
| Mode | Free / Hz / Sync | Sync | Which of the three rows below sets the wait |
| Time | 1 - 4,000 ms | 250 ms | How long to wait, in Free |
| Frequency | 0.25 - 1,000 Hz | 4 Hz | The wait said as a rate, in Hz |
| Cycle | bars to 1/64, dotted and triplet | 1/16 | How long to wait, in Sync |
| BPM | 20 - 300 | 120 | The tempo Sync counts against |
| Cancel | button | Throws away everything waiting and releases anything still sounding |
The original does not come out as well. A delay moves a note; something that plays the note and a copy of it later is a doubler, and that is the MIDI Echo with Dry on.
Every event of a note is delayed, not just its start, so a note-off arrives the same distance behind its note-on. That is what keeps the note the length you played it and what stops this hanging notes. Anything that is not a note passes straight through, undelayed.
Cancel is what to reach for after a change of tempo, a transport jump or a mistake. It throws away everything still waiting and then releases anything it has sounding, in that order.
Inputs: MIDI In, Mode, Time, Frequency, Cycle, BPM, Cancel Outputs: MIDI Out
MIDI Echo
The same engine with the dials unlocked: the notes again, and again, optionally a few semitones further each time.
- A delayed voice. Repeats 1, Dry on. Both the original and the copy go out, so two instruments play a beat apart.
- A line. More repeats, and Transpose moves every one of them a few semitones from the one before it, cumulatively, so what comes back climbs or falls rather than repeating the same note four times.
| Parameter | Range | Default | Description |
|---|---|---|---|
| Mode | Free / Hz / Sync | Sync | Which of the three rows below sets the gap |
| Time | 1 - 4,000 ms | 250 ms | Gap between repeats, in Free |
| Frequency | 0.25 - 1,000 Hz | 4 Hz | The gap said as a rate, in Hz |
| Cycle | bars to 1/64, dotted and triplet | 1/16 | Gap between repeats, in Sync |
| BPM | 20 - 300 | 120 | The tempo Sync counts against |
| Repeats | 0 - 16 | 3 | How many copies follow the original |
| Transpose | -24 - +24 st | 0 | Semitones added to each repeat, cumulatively |
| Dry | On / Off | On | Whether the original goes out as well as the repeats |
| Cancel | button | Throws away everything waiting and releases anything still sounding |
A repeat landing on a note that is still sounding retriggers it, exactly as a hardware MIDI delay does. Every repeat keeps the velocity it was played with, so what makes a run fade is the instrument at the far end rather than anything in here.
Both nodes are laid out the way the CV Delay Line is, and offer the same three ways to say one number. Free is milliseconds. Hz is a rate, which is what to reach for when whatever drives that pin already speaks in Hz. Sync is a musical value counted against BPM, and BPM has a pin, so wiring a Transport node into it is what makes either node follow the host. Free and Hz cover the same span from opposite ends: 0.25 Hz is 4,000 ms and 1,000 Hz is 1 ms.
Rows that do not apply to the mode you are in are greyed, not hidden. A panel that drops rows as you switch modes moves everything below them and leaves you hunting for what went, which costs more than a row you can see is switched off.
Inputs: MIDI In, Mode, Time, Frequency, Cycle, BPM, Repeats, Transpose, Dry, Cancel Outputs: MIDI Out
MIDI Humanize
A sequencer puts every note exactly on the grid, and exactly is the one place a player never is. This holds each note back by a random amount and changes nothing else: same pitch, same velocity, same length.
| Parameter | Range | Default | Description |
|---|---|---|---|
| Amount | 0 to 100 % | 25 % | How much of the Max window is in use. The one worth automating. |
| Max | 1 to 3,000 ms | 40 ms | Furthest a note can land behind the grid. |
| Cancel | button | Throws away everything waiting and releases anything still sounding |
Two controls because they are two jobs. Max is a setting: you decide once how loose this part should ever get. Amount is a performance, and it is the one to put a CV or an automation lane on, because a sweep from 0 to 100 runs from dead straight to as loose as you allowed. Two millisecond figures that have to be kept agreeing are not something you can sweep.
To lay a whole part back rather than scatter it, that is MIDI Delay, which holds every note by the same amount and is the better tool for it.
The range runs to three seconds, far past humanising, on purpose: past a few hundred milliseconds the notes scatter, a chord comes out as an arpeggio nobody wrote, and a part turns into a cloud. That is a different instrument rather than a worse setting.
Small numbers are the useful ones. Five milliseconds is a tight player, fifteen is a loose one, and past thirty it stops reading as feel and starts reading as a mistake. Try it on one part rather than all of them: what makes a programmed part sound played is usually that it disagrees slightly with the parts around it.
It can only make a note late, and that is a fact about live MIDI rather than a limitation here. The note arrives when it arrives, and nothing can have known about it a moment earlier. Humanisers that push notes both ways pay for it by delaying everything by half their range first, so the middle of the range becomes "on time" — and then they cost that much latency for as long as they are in the patch, including turned down to zero. This one does not make that trade: the pattern drags very slightly behind the grid, and the node adds no delay it was not asked for. If you want the part centred, move the part.
Every event of a note is moved, not just its start, so a note-off travels the same distance as its note-on. That is what keeps the note the length you played it, and it is the difference between humanising a part and damaging it.
For velocity that varies note to note, that is MIDI Random Velocity.
Inputs: MIDI In, Amount, Max, Cancel Outputs: MIDI Out
MIDI Density
Watches the MIDI going past and turns how busy it is into a control signal, so the patch can react to how much is already happening. It reads the stream without touching it: there is no MIDI output, so wire the same MIDI into this and into whatever plays it.
| Parameter | Range | Default | Description |
|---|---|---|---|
| Mode | Rate / Held | Rate | What busy means. Rate is how often something arrives, Held is how many notes are down at once |
| Count | Note Ons / All Events | Note Ons | Which messages count towards the rate. Rate mode only |
| Full At (ev/s) | 1 to 64 | 12 | Events per second that Density reads as 1.0. Rate mode only |
| Full At (notes) | 1 to 32 | 6 | Notes held at once that Density reads as 1.0. Held mode only |
| Rise | 0 to 5,000 ms | 300 ms | How long Density takes to climb. 0 arrives instantly |
| Fall | 0 to 10,000 ms | 1,500 ms | How long it takes to come back down |
Busy is two different things, and a fast hi-hat and a six-note chord are both busy without looking anything like each other. Rate counts how often; Held counts how much is sounding at once. Mode picks which one drives Density, and both readings leave on their own pins regardless, so nothing is hidden.
Full At is what makes the same node usable on a sparse pad and on a drum roll: Density is the measurement divided by it, clamped to 0 to 1. What counts as flat out is a musical decision and it belongs to your patch.
Rise and Fall are separate, and the defaults are far apart on purpose. Something that follows the input exactly is the input again. What is useful is a value that climbs as a passage fills up and takes its time coming back down, which is what makes it worth patching into anything slow.
Patch Density into MIDI Humanize's Amount and a part loosens up as it gets busier. Into a filter cutoff and the sound opens as more arrives. Into anything generative and it can answer what it is already playing.
Count only applies to Rate. Note Ons is the musical reading; All Events counts everything including CC and pitch bend, which is the one to use to follow a busy controller rather than a busy part.
Inputs: MIDI In Outputs: Density (0 to 1), Rate (events per second), Held (notes down now). All three are CV.
MIDI Chord Detector
Reads the notes being held on a MIDI input and tells you what chord they are, as text: "C", "Am7", "F#m7b5", "C13#11". Send the name to a Widget Text and your panel shows the chord as you play it. The node shows it too, so you can read it straight off the graph.
Needs: screenshot of the MIDI Chord Detector on the graph with a chord held, showing a name in its Chord readout.
| Parameter | Range | Default | Description |
|---|---|---|---|
| Accidentals | Sharps / Flats | Sharps | Whether black keys are spelled C# or Db. It changes the name only, never the detection. |
| Chord | (read-only) | (empty) | The chord being detected right now. |
| Text Size | 8 to 200 | 28 | Font size of the name. A ceiling rather than a fixed size: a long name is scaled down to fit. |
| Font Style | Regular / Medium / SemiBold / Bold / Light (+ italics) | SemiBold | Weight and italic style. |
| Justification | 9-way (Top Left to Bottom Right) | Centre | Where the name sits inside the display. |
| Padding | 0 to 80 | 8 | Inner padding around the name. |
| Text Colour | colour | theme | Colour of the name. |
| Background Colour | colour | transparent | Background fill of the display. |
| Border Colour / Border Width | colour / 0 to 12 | theme / 1 | The frame around the display. |
| Corner Radius | 0 to 40 | (theme) | Roundness of the corners. |
Inputs: MIDI In (notes are tracked as they are held and released, so it follows real playing), Accidentals (0 for sharps, 1 for flats), Appearance (JSON object to restyle the display).
Outputs: Chord, the name as text. It is sent whenever the chord changes, and it is empty while nothing is held.
It is its own display
The node draws the chord name itself, and that display goes on the front panel like any widget: right-click and Add to Front Panel. So the simple case needs no wiring at all, just the MIDI in. Font family and weight, size, colours, padding, border and corner radius all live in Appearance, and they can be driven live from the Appearance input like any other widget, so a patch can restyle the readout while it plays.
The Chord output is still there for when you want the text somewhere else: a Widget Text with its own look, a File node writing a chart, a comparison that fires when a particular chord arrives.
Big chords get a name, not a list
Most chord detectors compare what you play against a list of chord shapes, which works until you play something bigger than the list. This one does not compare, it reads. Every note you are holding is tried as the root, the rest are given their degree above it (third, fifth, seventh, then the ninths, elevenths and thirteenths), and the reading that has to bend the least theory wins. The name is then built from that reading.
The practical consequence is that size stops mattering. A seven-note two-handed voicing costs it exactly what a triad does:
| What you hold | What it says |
|---|---|
| C E G | C |
| C E G Bb D | C9 |
| C E G Bb D F# | C9#11 |
| C E G Bb D F# A | C13#11 |
| C D Eb F G A Bb | Cm13 |
| C D E F# G A B | Cmaj13#11 |
| C Db E Gb Ab Bb | C7alt |
Octaves are ignored: the notes are folded into the twelve pitch classes, which is why a chord spread over three octaves reads the same as the same chord played in a block. Only a note you are actually playing can be the root, so it never names a chord around a note that is not there.
Ambiguity, inversions and giving up
Two chords can be exactly the same notes. C, E, G and A is both C6 and Am7, and there is no way to tell from the notes alone. The node breaks the tie with the lowest note you are holding: put C at the bottom and it says C6, put A at the bottom and it says Am7. When the bass is not the root at all you get a slash chord, "Cmaj9/E", which is what makes an inversion readable at a glance.
And it gives up honestly. When no reading is plausible enough, a cluster or a couple of passing notes, it shows the notes it can see rather than inventing a chord, and past six notes it shows the bass and a count instead of an unreadable row of letters. That is the exception now, not what happens every time the music gets interesting.
MIDI Arpeggiator
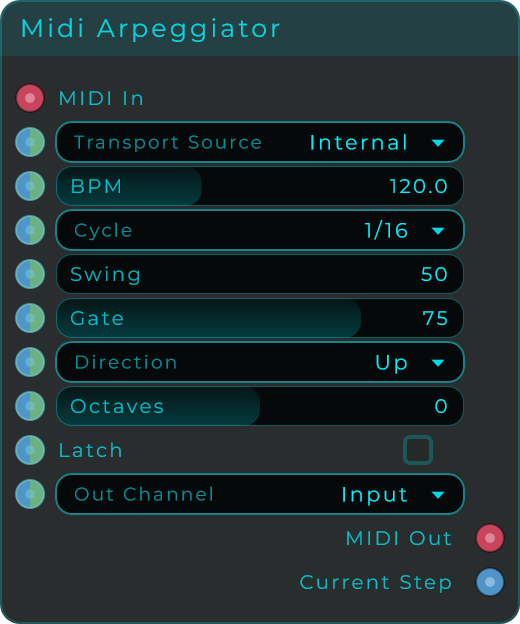
Takes a held chord and plays its notes one after another as a running pattern (an arpeggio). It gives you eight different play orders, swing for a more human feel, control over how long each note rings, the option to spread notes across extra octaves, and a latch to keep the pattern going after you let go. It can run on its own built-in tempo or follow the play/stop and tempo of your music software (the transport). An Enable switch mutes the pattern without losing your hands' position: the arp keeps watching the keyboard while it is off, and switching it back on resumes from whatever you are still holding.
| Parameter | Range | Default | Description |
|---|---|---|---|
| Enable | On / Off | On | Off stops the arp from sending notes (ending the sounding one cleanly) while it keeps tracking held keys; back on, the pattern resumes from what you are holding. Drive it from a Toggle or a gate to punch the arp in and out. |
| Transport Source | Internal, Transport (DAW) | Transport (DAW) in plugin mode, Internal in standalone | Clock source: the internal BPM, or the host transport. |
| BPM | 20 to 300 | 120 | Tempo used in Internal mode. |
| Cycle | Bars and note values (dotted and triplet included) | 1/16 | Musical length of each arp step. |
| Play Mode | Forward, Reverse, Ping-Pong | Forward | Which way the loop is read. Reverse walks it from its end back to its start; Ping-Pong goes out and back, turning at each end, so a pass takes twice as long. It applies to every transport source, the incoming Phase included. |
| Scale | Chromatic and the app's full scale list | Chromatic | Pick a scale and the roll shows ONLY its notes: no wrong rows to avoid, and dragging a note up or down moves it by a degree rather than a semitone. Changing it moves every note in every slot to the nearest note of the new key, so the pattern comes with you. |
| Root | C to B | C | Root the scale is built from. The keyboard labels this note instead of C on thin rows. |
| Swing | 50 to 99 % | 50 | Swing amount. 50 is straight; higher delays the odd steps. |
| Gate | 1 to 100 % | 75 | Note length as a percentage of the step length. |
| Direction | Up, Down, UpDown, DownUp, Played, Reverse Played, Random, Chord | Up | How the held notes are sequenced. Chord plays them all at once. |
| Octaves | -4 to +4 | 0 | Octave spread. 0 is the original octave only. |
| Latch | On / Off | Off | When on, notes keep playing after keys are released; new notes add to the pattern. |
| Out Channel | Input, 1 to 16 | Input | Output channel. Input keeps each note on its incoming channel. |
Every control can be set on the node or driven from an input.
Inputs: MIDI In, Enable, Transport, BPM, Cycle, Swing, Gate, Direction, Octaves, Latch, Out Ch. Outputs: MIDI Out (the arpeggio), Current Step (which step is playing, counted from 0, and -1 while nothing sounds; sent whenever it changes).
MIDI Scale
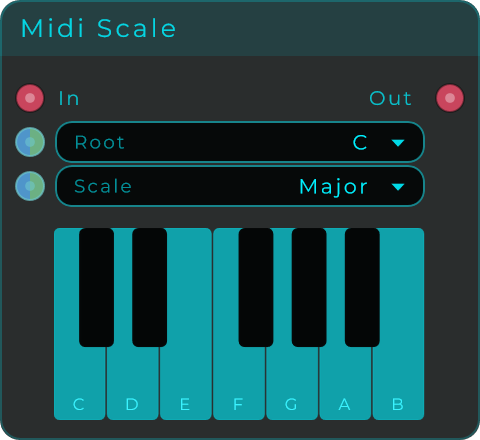
Pulls any incoming note onto a key you choose. Notes that do not belong to the key are nudged to the nearest note that does, which is a handy way to keep random or auto-generated MIDI sounding in tune and in key. The piano keyboard part of the node can be placed on the front panel, and clicking its keys lets you build your own Custom scale.
| Parameter | Range | Default | Description |
|---|---|---|---|
| Root | C, C#, D, D#, E, F, F#, G, G#, A, A#, B | C | Root note of the scale. |
| Scale | Built-in scales (Major, Minor and more) plus Custom | Second preset in the list | Which scale to snap notes to. |
Root and Scale can be set on the node or driven from inputs, and both update continuously at stream rate. Anything that is not a note passes through untouched. There is also an Appearance input that takes a small block of JSON text so you can change the keyboard's colours.
Inputs: MIDI In, Root, Scale, Appearance (JSON). Outputs: MIDI Out (the quantized notes).
MIDI Transpose
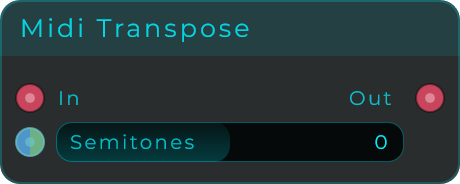
Moves every incoming note up or down in semitones (the smallest steps between piano keys), up to two octaves in either direction. It is the quick way to change key without re-recording anything. Non-note messages pass through, and notes already being held keep the shift they started with.
| Parameter | Range | Default | Description |
|---|---|---|---|
| Semitones | -24 to +24 | 0 | Semitones to shift. +12 is an octave up, +7 a perfect fifth, 0 passes through. |
The Semitones control can be set on the node or driven from an input.
Inputs: MIDI In, Semitones. Outputs: MIDI Out (transposed MIDI).
MIDI Velocity
Gives every note that passes the same velocity, whatever it arrived with. Everything else in the MIDI stream passes through unchanged.
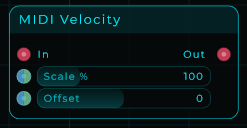
| Parameter | Range | Default | Description |
|---|---|---|---|
| Velocity | 1 to 127 | 100 | The velocity every note leaves with. |
Velocity can be set on the node or driven from its input, which is how you get a velocity that follows something else in the patch.
Changed in 1.0.8
This node used to be Scale % and Offset, a transform rather than a value, and forcing a fixed velocity meant knowing to set Scale to 0 and put the number in Offset. A node called MIDI Velocity should take a velocity.
Patches saved with the old node: if Scale was 0, that setting was a fixed velocity written the long way round and it carries across intact. Any other combination was scaling the incoming velocity, there is no honest single number to turn that into, and those nodes come up at the default. Cables into the old Scale and Offset pins are dropped rather than pointed at the new control, because a value scaled for 0-400 arriving at a 1-127 control is not a migration.
For a velocity that differs from note to note, see MIDI Random Velocity below.
Inputs: MIDI In, Velocity. Outputs: MIDI Out.
MIDI Chance
Every note that arrives gets a roll of the dice. Chance is the percentage that get through: 100 is everything, 0 is nothing, and the numbers in between are the point.
| Parameter | Range | Default | Description |
|---|---|---|---|
| Chance | 0 to 100 % | 100 % | Percentage of notes that get through. |
| Seed | 0 to 9,999 | 1 | Picks which sequence of rolls you get. |
| Reset | button | Starts the sequence again from the Seed. |
A sixteenth pattern at 70 % plays most of what it was given and leaves holes where it did not, and the holes fall somewhere new each time round.
Seed and Reset decide whether that is the same each time. A seed picks which sequence of rolls you get, so the same seed gives the same gaps in the same places. Reset starts that sequence over, which is what to send at the top of a loop if you want the pattern to repeat. Leave Reset alone and it never repeats, which is right for a texture and wrong for a hook.
The decision is taken when the note starts and remembered, so a note that gets in always gets to stop. Rolling per message would eventually let a note begin and then block the message that ends it, and that note would sound until something else turned it off. A note whose start was never seen, held from before this node ran, passes rather than being dropped: a stray note-off is harmless and swallowing a real one is a stuck note.
Anything that is not a note passes through untouched, so a controller sweep is never cut in half by accident.
Inputs: MIDI In, Chance, Seed, Reset Outputs: MIDI Out
MIDI Random Velocity
Draws a fresh velocity for every note, somewhere between Min and Max. Everything else in the MIDI stream passes through unchanged.
| Parameter | Range | Default | Description |
|---|---|---|---|
| Min | 1 to 127 | 60 | Quietest velocity a note can be given. |
| Max | 1 to 127 | 100 | Loudest velocity a note can be given. |
This is what stops a programmed part sounding programmed. A sequencer gives every note the same weight and no player alive does that; a range of twenty or thirty is usually plenty to break the flatness without turning the part into weather.
It replaces the incoming velocity rather than nudging it, which is right on sequenced material where the flatness is the problem in the first place. On a part that was actually played, it throws away the dynamics you performed and randomises what is left, so it is not the tool for loosening a performance.
Min above Max is not an error: they are sorted before use, so dragging one past the other keeps working instead of going quiet until they are the right way up. Neither reaches 0, because a note-on with a velocity of zero is a note-off in disguise and the note would never sound.
For one velocity for every note, that is MIDI Velocity. For notes that arrive slightly late rather than slightly quieter, that is MIDI Humanize.
Inputs: MIDI In, Min, Max. Outputs: MIDI Out.
MIDI Set Channel
Moves every message that belongs to a channel (notes, knob and slider movements, aftertouch, pitch bend and program change) onto one channel you pick. Messages that do not belong to any channel, like the tempo clock, the transport and SysEx, pass through unchanged.
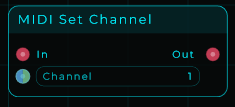
| Parameter | Range | Default | Description |
|---|---|---|---|
| Channel | 1 to 16 | 1 | Target channel for all channel-voice messages. |
The Channel control can be set on the node or driven from an input.
Inputs: MIDI In, Channel. Outputs: MIDI Out (MIDI with all channel messages re-assigned).
MIDI Merge
Joins up to four separate MIDI streams into one. Every message from each connected input is sent on to the single output with its timing kept intact. Useful for putting split MIDI back together, or for stacking several MIDI nodes into one stream before MIDI Out.
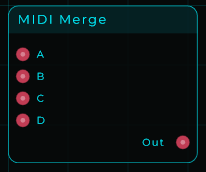
Inputs: A, B, C, D (MIDI streams). Outputs: MIDI Out (the merged stream).
MIDI Pass
A pass-through that changes nothing: whatever MIDI comes in goes straight out, untouched. That sounds like doing nothing, but it makes a handy junction point. Give it a clear name and use it to gather several cables into one spot, fan one stream out to many places, keep long cable runs tidy, or hold a place in the chain while you are still building the patch. It is the MIDI version of CV Pass and Sig Pass.
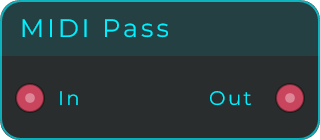
Inputs: MIDI In. Outputs: MIDI Out (the same MIDI, unchanged).
MIDI CC Transform
Reassigns one knob or slider control (a CC) to a different one, and can scale or shift its value along the way. Messages that match From CC come back out as To CC, with the value multiplied by Scale % and then with Offset added, kept within 0 to 127. Everything else, including controls that do not match, passes through unchanged.
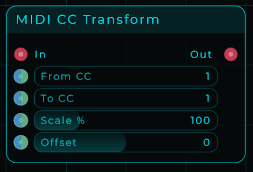
| Parameter | Range | Default | Description |
|---|---|---|---|
| From CC | 0 to 127 | 1 | Controller number to match (1 is the mod wheel). |
| To CC | 0 to 127 | 1 | Controller number to emit instead. |
| Scale % | 0 to 400 % | 100 | Value multiplier in percent. |
| Offset | -127 to +127 | 0 | Added to the value after scaling. The result is clamped to 0-127. |
If you set From CC and To CC to the same number, you can scale or shift a control without changing which one it is. All four controls can be set on the node or driven from inputs.
Inputs: MIDI In, From CC, To CC, Scale, Offset. Outputs: MIDI Out (MIDI with the matching CC transformed).
MIDI Convert
Converts one kind of MIDI message into another. It reads the value carried by the message type you pick in From (a note's velocity or note number, a knob or slider movement (CC), pitch bend, channel or poly pressure, or a program change), keeps its relative position, and sends it back out as the message type you pick in To. A classic use is turning how hard you play into a control stream: set From to Note Velocity and To to CC, and every note's loudness comes out as a CC you can route anywhere.
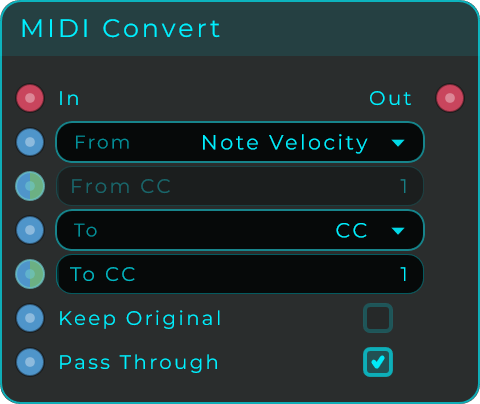
| Parameter | Range | Default | Description |
|---|---|---|---|
| From | Note Velocity, Note Number, CC, Pitch Bend, Channel Pressure, Poly Pressure, Program Change | Note Velocity | Which message type to read the value from. |
| From CC | 0 to 127 | 1 | The controller number to match. Only used when From is CC. |
| To | CC, Pitch Bend, Channel Pressure, Program Change | CC | Which message type to send instead. |
| To CC | 0 to 127 | 1 | The controller number to send. Only used when To is CC. |
| Keep Original | On / Off | Off | When on, the matched message is also passed along, so you extract a copy instead of replacing it. |
| Pass Through | On / Off | On | When on, every message that does not match From passes through unchanged. |
The converted message stays on the channel of the message it came from. All six controls can be set on the node or driven from inputs.
Inputs: MIDI In, From, From CC, To, To CC, Keep Original, Pass Through. Outputs: MIDI Out (the converted MIDI).
MIDI Filter
Decides which KINDS of MIDI get through. The Note Filter answers "which notes"; this one answers "which messages". One switch per family, all on to begin with, so the node starts as a piece of wire and becomes a filter as you turn things off. Anything it passes it passes untouched.
Needs: the node with its switches, one or two of them off.
| Parameter | Range | Default | Description |
|---|---|---|---|
| Notes | on / off | on | Note presses and releases. |
| Poly Aftertouch | on / off | on | Pressure sent per key. |
| Channel Aftertouch | on / off | on | One pressure value for the whole keyboard. |
| Control Change | on / off | on | The master switch for controllers. Off means none of them, whatever the range below says. |
| CC Low | 0 to 127 | 0 | Lowest controller number the range covers. |
| CC High | 0 to 127 | 127 | Highest controller number the range covers. |
| CC Mode | Pass Range / Block Range | Pass Range | Whether the controllers inside the range are the ones that get through, or the ones that do not. |
| Program Change | on / off | on | Patch changes. |
| Pitch Bend | on / off | on | The pitch wheel. |
| SysEx | on / off | on | System exclusive messages. |
| Clock | on / off | on | The timing clock, twenty-four ticks a beat. |
| Transport | on / off | on | Start, stop, continue, song position and song select. |
| Other System | on / off | on | Active sensing, reset, quarter frame and tune request. |
Controllers have a range of their own because "no controllers at all" is rarely the question. The two that come up are "not the mod wheel", which is Block Range with 1 to 1, and "sustain pedal only", which is Pass Range with 64 to 64. The switch stays the master: with Control Change off nothing gets through whatever the range says.
A note's release always follows its press, so turning Notes off with a chord held still lets those keys go. Nothing hangs.
Every switch has an input pin, so what passes can be part of the patch: a footswitch muting the wheel, a State recall changing what a layer answers to, one control shutting the clock off downstream.
Channels are the MIDI Channel Filter's job and this node leaves them alone.
Inputs: MIDI In, and a pin for every switch and for the controller range. Outputs: MIDI Out (what survived).
MIDI Note Filter
Lets notes through, or holds them back, depending on where they sit on the keyboard. Notes between the Low and High note are either kept (Pass Range) or removed (Block Range). A note's release always follows whatever happened to its press, so changing the range while a note is held never leaves it stuck. Other MIDI passes through.
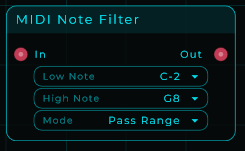
| Parameter | Range | Default | Description |
|---|---|---|---|
| Low Note | C-2 to G8 (by letter name) | C-2 (lowest) | Lowest note of the range. |
| High Note | C-2 to G8 (by letter name) | G8 (highest) | Highest note of the range. |
| Mode | Pass Range, Block Range | Pass Range | Pass Range keeps notes inside the range; Block Range removes them. |
You pick the notes by name (for example C3 or F#4), where C3 is middle C. Great for splitting a keyboard into zones, so different ranges of keys can do different things.
All three settings have an input pin, so the patch can move them: a sequencer stepping through zones, a control changing what a layer answers to, or one note number opening a gate. Send note numbers to Low and High (60 is C3), and 0 or 1 to Mode. Held notes stay safe while you move the range, because a note release always follows whatever happened to its press.
Inputs: MIDI In, Low Note, High Note, Mode. Outputs: MIDI Out (the filtered stream).
MIDI Note Remap
Swaps individual notes for other notes, chosen by name. You get up to eight From-to-To slots. A slot only does something when its From and To notes are different, and if more than one slot matches, the last matching one wins. Notes you have not mapped keep their pitch, and a note's release follows the new pitch its press was sent to.
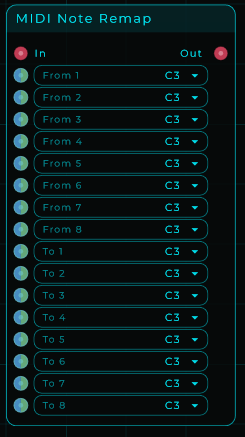
| Parameter | Range | Default | Description |
|---|---|---|---|
| From 1 to From 8 | C-2 to G8 (by letter name) | C3 | The note to match for each slot. |
| To 1 to To 8 | C-2 to G8 (by letter name) | C3 | The note to send instead for each slot. |
Each From and To can be set on the node or driven from an input. Other MIDI passes through unchanged. Handy for rearranging which key triggers which drum or pad.
Inputs: MIDI In, From 1 to From 8, To 1 to To 8. Outputs: MIDI Out (MIDI with remapped notes).
MIDI Single Note Remap
Remaps exactly one note to another. When a note matching In Note (and, if you set one, In Channel) arrives, it comes out as Out Note on Out Channel, optionally with a fixed loudness from Out Velocity. Every other message passes through untouched. Where the eight-slot MIDI Note Remap handles a whole set of mappings, this one is for when you just need a single change, like moving one drum pad to a different sound, and it can also change the note's channel and velocity along the way.
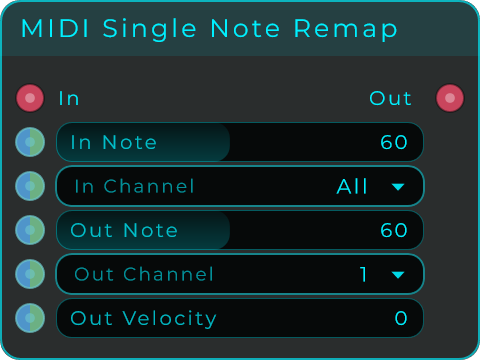
| Parameter | Range | Default | Description |
|---|---|---|---|
| In Note | 0 to 127 | 60 | The note number to catch. |
| In Channel | All, 1 to 16 | All | Only match the note on this channel. All matches it on any channel. |
| Out Note | 0 to 127 | 60 | The note number to send instead. |
| Out Channel | All, 1 to 16 | 1 | The channel to send on. All sends the note to all 16 channels at once. |
| Out Velocity | 0 to 127 | 0 | Velocity for the remapped note. 0 keeps the original velocity; 1 to 127 forces that fixed value. |
A note's release always follows where its press was sent, so changing the controls while a note is held never leaves it stuck. Chain a few of these to route different notes to different channels. All five controls can be set on the node or driven from inputs.
Inputs: MIDI In, In Note, In Channel, Out Note, Out Channel, Out Velocity. Outputs: MIDI Out (MIDI with the one note remapped).
MIDI Matrix
A patchbay you draw, for MIDI. Up to sixteen sources run down the side of the grid, up to sixteen destinations across the top, and clicking a cell connects that source to that destination. Several cells in one row merge several sources into the same output; several in one column send one source to several instruments at once.
That is the difference between this and MIDI Select. A Select answers which one, with a number. A matrix answers what goes where, all of it at once. It is also the MIDI Merge and then some, since a row is a merge you can change your mind about.
Needs: screenshot of the MIDI Matrix node on the graph.
Setups are the other half of the node. There are eight, each holding a whole grid, and Setup chooses which one is live, so one number changes every route at once. Click the numbers along the top of the body to move between them; a setup you have drawn something in shows solid and an empty one shows hollow. Show Setup Strip in the Inspector hides the row if one routing is all you need.
Drag across the grid to draw a run of cells rather than clicking them one at a time; the first cell decides whether the stroke is drawing or erasing. Right-drag always erases. The node is resizable and everything in it is worked out from the counts, so the grid stays square and readable from a two by two up to a sixteen by sixteen. It drops onto the front panel like any other widget, and its background, grid, dots and numbers are each an Appearance property.
| Parameter | Range | Default | Description |
|---|---|---|---|
| Setup | 0 - 7 | 0 | Which of the eight grids is live |
| Inputs | 1 - 16 | 2 | How many inputs the node has |
| Outputs | 1 - 16 | 2 | How many outputs the node has |
A keyboard split written in setup 1 and a layer in setup 2 is a change of the entire instrument on one number.
An output that loses a source is sent All Notes Off, on every channel, ahead of anything else in that block. That is not tidiness: shut a cell while a note is held and the note-off, when it comes, arrives at a door that is no longer open, and the instrument on the far side holds that note until something else stops it. Only the output that lost something is sent it, so the rest of the grid plays through the change.
There is no Fade here, unlike the audio and CV matrices: a ramp exists to stop a signal stepping, and an event has nothing to step through.
Inputs: One MIDI input per source, Setup, Inputs, Outputs, Appearance (JSON) Outputs: One MIDI output per destination, Setup Out
MIDI Select
Several MIDI inputs, one output, and an Index that says which one reaches it. The rest are ignored: this commits to a single source rather than merging, which is what separates it from the MIDI Merge. It is the MIDI half of the Audio Select and counts the same way, from 0.
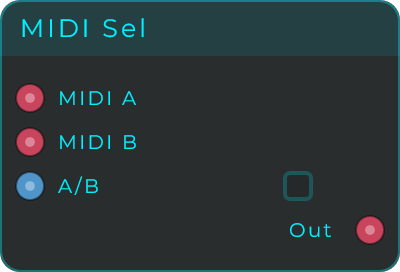
| Parameter | Range | Default | Description |
|---|---|---|---|
| Index | 0 - (Inputs - 1) | 0 | Which input reaches the output. Index 0 is In 0. |
| Inputs | 2 - 16 | 2 | How many MIDI inputs the node has. Turning it down takes the cables on the removed pins with it. |
Switching sends All Notes Off on every channel. A note let through by the input you just left has no release coming, because that release will arrive at an input nobody is listening to. Without this it would hang until something else stopped it.
Drive Index from a ComboBox, a Button, a counter or a sequencer and the whole MIDI source changes with one number. Index Out reports the current input as a number, for a display or to keep something else in the patch in step.
This node used to be called MIDI Sel, with two inputs and an A/B toggle. Patches built with it open unchanged: In 0 and In 1 are the pins MIDI A and MIDI B were on, and the pin the toggle sat on is now Index, where the 1 it used to send still means the second input.
Inputs: In 0 to In N-1 (MIDI), Index, Inputs. Outputs: MIDI Out (the selected input), Index Out.
MIDI Channel Filter
Lets through only the MIDI coming in on one channel and ignores the rest. Messages that have no channel at all, like the tempo clock, the transport and SysEx, are dropped.
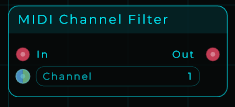
| Parameter | Range | Default | Description |
|---|---|---|---|
| Channel | 1 to 16 | 1 | The channel to keep. Everything else is dropped. |
The Channel control can be set on the node or driven from an input.
Inputs: In, Channel. Outputs: Out (raw MIDI from the selected channel only).
MIDI Channel Gate
Puts out a simple on/off signal (a gate): it reads 1 while any note on the chosen channel is being held, and 0 the rest of the time. Useful for kicking off CV logic whenever there is activity on one particular MIDI channel.
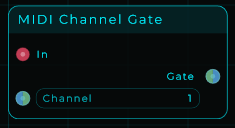
| Parameter | Range | Default | Description |
|---|---|---|---|
| Channel | 1 to 16 | 1 | The channel to watch for held notes. |
The Channel control can be set on the node or driven from an input.
Inputs: In, Channel. Outputs: Gate (1 while a note from the selected channel is held, 0 otherwise).
MIDI Riff Generator
A step-by-step MIDI riff maker that plays one note per step. Its timing can lock to your music software, to an outside position or phase signal, or run freely on its own tempo. It can create patterns for you, slide them around, transpose them and loop them. Holding notes transposes the riff, and its step grid (laid out like a keyboard) can be placed on the front panel.
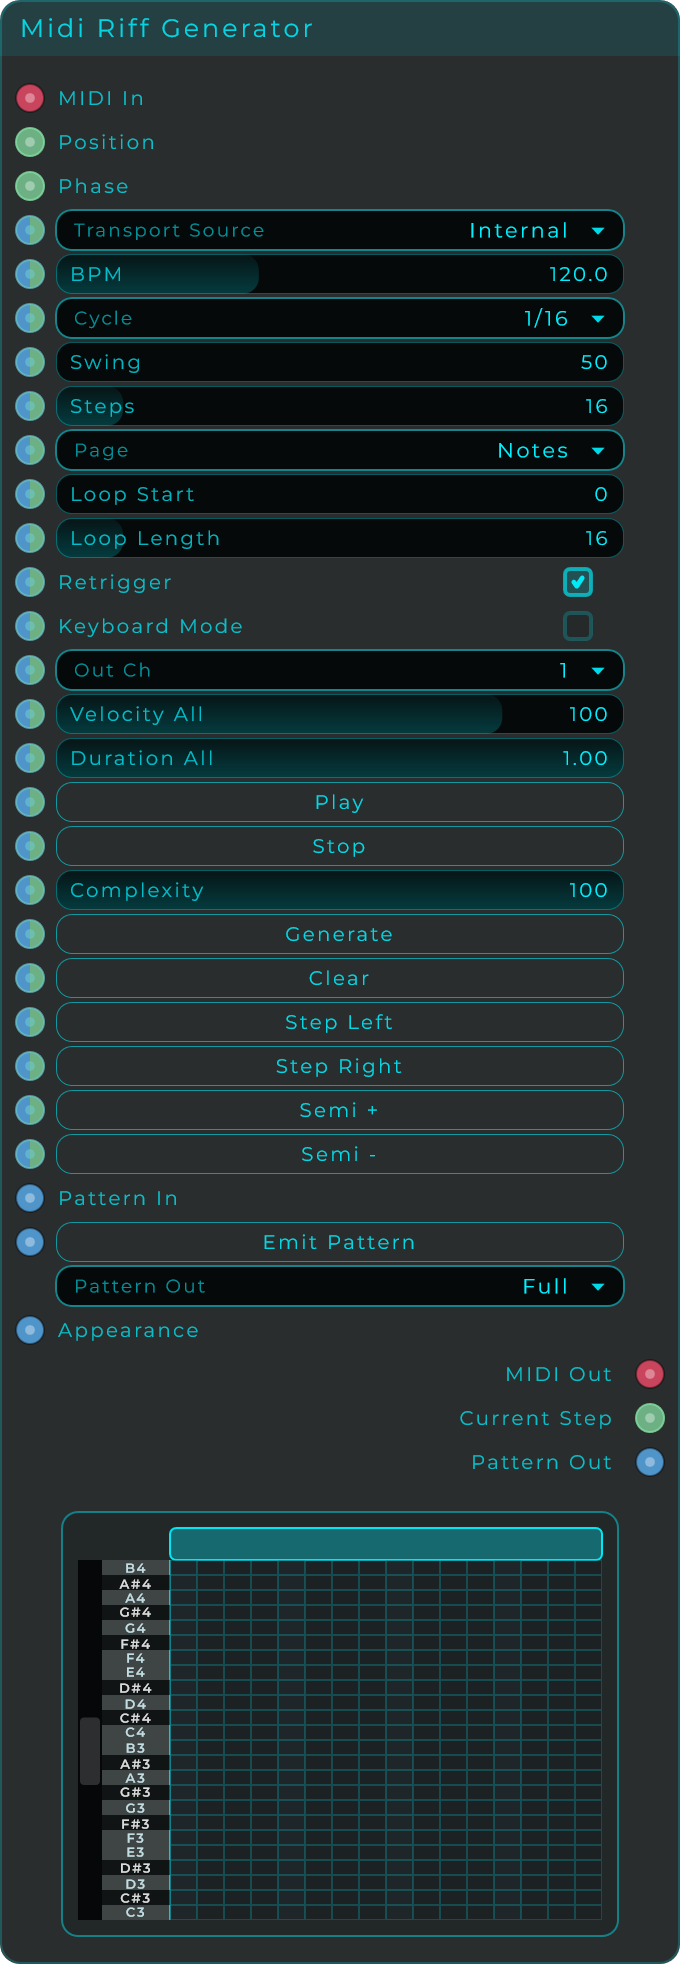
| Parameter | Range | Default | Description |
|---|---|---|---|
| Transport Source | Internal, Transport (DAW), External Position, External Phase | Transport (DAW) in plugin mode, Internal in standalone | Where the sequencer gets its timing. |
| BPM | 20 to 300 | 120 | Tempo used in Internal mode. |
| Cycle | Bars and note values (dotted and triplet included) | 1/16 | Musical length of each step. |
| Swing | 50 to 99 % | 50 | Swing amount. 50 is straight; higher delays the odd steps. |
| Steps | 1 to 128 | 16 | Number of steps in the pattern. |
| Page | Notes, Velocity, Duration | Notes | Which value the step grid edits. |
| Loop Start | 0 to 127 | 0 | First step of the playback loop. |
| Loop Length | 1 to 128 | 16 | Number of steps in the loop. |
| Retrigger | On / Off | On | When on, an incoming note restarts the pattern from the loop start. |
| Keyboard Mode | On / Off | Off | When on, the pattern plays only while a note is held and follows that note. |
| Out Ch | 1 to 16 | 1 | Output MIDI channel. |
| Velocity All | 1 to 127 | n/a | Sets the velocity of every step at once. |
| Duration All | 0.1 to 1.0 | n/a | Sets the note length of every step at once. |
| Complexity | 0 to 100 % | n/a | How busy the generated pattern is when you press Generate. |
| Pattern Out | Full, Active Only | Full | Whether the Pattern Out export includes every step or only active ones. |
Buttons on the node do one-time actions: Play and Stop (in Internal mode), Generate a fresh pattern, Clear it, Step Left / Step Right to roll the steps along, and Semi + / Semi - to transpose. Every control and button can also be driven from an input. A Pattern In takes a step-list in JSON text to load a pattern, and an Appearance input takes a JSON block so you can change the node's colours.
Inputs: MIDI In, Position, Phase, Transport Source, BPM, Cycle, Swing, Steps, Page, Loop Start, Loop Length, Retrigger, Keyboard Mode, Out Ch, Velocity All, Duration All, Play, Stop, Complexity, Generate, Clear, Step Left, Step Right, Semi +, Semi -, Pattern In (JSON), Emit Pattern, Appearance (JSON).
Outputs:
| Output | Description |
|---|---|
| MIDI Out | The generated riff. |
| Current Step | The active step index as CV. |
| Pattern Out | The current pattern as a step-list JSON. |
Piano Roll
A polyphonic piano roll with eight pattern slots. Unlike a step sequencer, a pattern here is a list of notes rather than a row of steps, so notes can overlap: three notes in the same place are a chord, and one note eight steps long is a pad. Each slot keeps its own length and loop region, so a 16-step groove and a 3-step polyrhythm can live side by side in the same node. The editor can be placed on the front panel.
| Parameter | Range | Default | Description |
|---|---|---|---|
| Slot | 1 to 8 | 1 | Which of the eight patterns plays and is edited. Changing it releases the notes of the pattern you are leaving. |
| Steps | 1 to 128 | 16 | Length of the current pattern. It belongs to the slot, not to the node. If the loop was covering the whole pattern it grows with it; a loop you narrowed on purpose is left where you put it. |
| Loop Start | 1 to 128 | 1 | First step of the loop region. |
| Loop Length | 1 to 128 | 16 | How many steps the loop covers. |
| Transport Source | Internal, Transport (DAW), External Position | Transport (DAW) in plugin mode, Internal in standalone | Where the timing comes from. |
| BPM | 20 to 300 | 120 | Tempo used in Internal mode. Hidden in the other three. |
| Rate | Bars and note values (dotted and triplet included) | 1/16 | Musical length of one step. Changing it re-times the whole pattern without moving a note. |
| Swing | 50 to 99 % | 50 | 50 is straight. Higher values push every second step later. Notes that do not sit on a step boundary keep their own placement. |
| Out Ch | 1 to 16 | 1 | Output MIDI channel. |
| Pass Through | On / Off | On | Copies incoming MIDI to the output, so the Piano Roll can sit in the middle of a chain, and it is how you hear yourself while recording. |
| Record | On / Off | Off | Arms recording. Notes played into MIDI In are written into the current pattern where the playhead is, quantised by Snap and fitted to the Scale. A note lands when you let the key go, which is when its length is known. Recording adds to what is already there; Clear Pattern empties it first. In Internal mode arming it also starts the clock. It never comes back armed after a reload. |
| Tool | Select, Draw, Erase | Draw | What the pointer does over the roll. The three buttons across the top of the editor are the same control, and Tool Out reports every change so a panel button and the buttons in the body can follow each other. |
| Snap | Off, then the same bars and note values Cycle offers (dotted and triplet included) | 1/16 | Grid the editor rounds to when you draw, move or resize a note. It is measured against the step, so changing Rate re-scales it without you touching anything. Off lets a note land anywhere, and holding Ctrl (Cmd on a Mac) while dragging ignores it just for that gesture. |
| New Note Velocity | 1 to 127 | 100 | Velocity given to a note you have just drawn. |
| New Note Length | 0.05 to 32 steps | 1 | Length of a note you have just drawn. Only used with Snap off; with Snap on a drawn note is one grid unit. |
| Emit On Change | On / Off | Off | Sends the pattern out of Pattern Out every time it changes, instead of only when you press Emit Pattern, so whatever is reading it is never holding a stale copy. Coalesced, so dragging a note sends once rather than once per pixel. |
| Lane View | Velocity, Lane 1 to Lane 4, Pitch Bend | Velocity | What the strip under the roll shows and edits. |
| Lane 1 to 4 CC | 0 to 127 | 1, 11, 74, 7 | Controller number each lane sends, and the one it records from. |
| Velocity Lane | 0 to 260 px | 64 | Height of the velocity lane under the roll. 0 closes it. The splitter between the two drags it. |
| Show Tool Buttons | On / Off | On | Whether the row of tool buttons is drawn across the top of the editor. With it off the roll gets that room back, and the Tool control still chooses the tool. |
Editing in the body. Three tools, chosen with the buttons across the top of the editor or with the Tool control: the crosshair selects, the pencil draws and the eraser removes. Only what happens over empty space changes between them; a note is always moved, resized and given its velocity the same way.
| Gesture | What it does |
|---|---|
| Pencil on empty space | Click places a note; drag places it and sets its length in one gesture. |
| Crosshair on empty space | Drag draws a selection box around the notes inside it. Shift-drag adds them to what is already selected. A click that does not move lets go of everything. |
| Alt on empty space | Draws, whichever tool you are holding, so you can select and draw without going back to the toolbar between them. Over a note alt still sets its velocity. |
| Shift-drag on empty space | Draws the selection box, whichever tool you are holding: the mirror of alt, for picking a few notes up without going back to the toolbar. Shift-clicking a note still adds and removes one, so boxing some and then adding another is the same key twice. |
| Eraser | Click a note to remove it, or drag across several. |
| Drag a note | Moves it. Everything selected moves with it, keeping its shape. |
| Drag a note's left or right edge | Lengthens or shortens it from that end, so a note grows forwards or backwards. |
| Alt-drag a note up or down | Velocity, which the note shows as its weight: a quiet note is faint, a loud one solid and bright. |
| Drag a bar in the velocity lane | With nothing selected, sets that note's velocity and dragging sideways writes the same height into every bar it crosses. With something selected, only the selection moves. Right-click a bar to delete its note. |
| Drag the splitter under the roll | Opens and sizes the velocity lane. Double-click it to open or shut it in one go. |
| Drag across the velocity lane | With nothing selected, paints velocities as it goes: every bar the pointer crosses takes the height it was at as it went past, so a sweep draws a shape rather than setting one note. Starting on bare lane is fine. |
What is selected is what moves. With nothing selected the lane is a drawing surface and a sweep writes every bar it crosses, chords and all. With notes selected the lane only touches those: one note held goes wherever the pointer is, at any height, anywhere along the lane, and several held keep their shape and move together by the same amount.
That is how you reach one note of a chord. Notes played together draw their bars in the same place, so there is nothing to aim at down here. Click the note you want in the ROLL, where every note is on a row of its own and there is nothing to miss, then drag in the lane. Pressing a bar that is not part of the selection makes it the selection, so a quick single edit still costs one gesture. | Right-click a note | Deletes it, or the whole selection if it is part of one. Keep the button held and drag to rub out everything you cross. Both work whichever tool you are holding. | | Click a note | Selects it. Shift-click adds or removes one. A selected note is ringed, inside and out, and gets a grip at each end; its fill is left alone so its velocity still reads while you are editing it. A note too thin to have an inside keeps only the outer ring and a hairline, so it stays as bright as its velocity says. | | Ctrl-drag (Cmd on a Mac) | Ignores Snap for that gesture only. | | Drag in the ruler at the top | The ruler counts the bars. Hold it and drag: along it the roll follows the pointer, and up and down it zooms (down is closer), both in the same gesture, with the place you took hold of staying under the pointer. Double-click shows the whole pattern. | | Middle button over the notes | Takes hold of the roll and moves it, through time and up and down the keyboard at once, the way the middle button moves the graph. Anywhere else on the node it still moves the graph. | | Drag the bar above the grid | Moves the loop. Its ends resize it. Double-click resets it to the whole pattern. | | Drag the strip on the left | Scrolls the pitch range. Its two grips zoom it. Double-click frames the notes that are actually there. | | Drag the strip along the bottom | Scrolls through time. Its two grips zoom. Double-click shows the whole pattern. | | Wheel | Scrolls the pitch range. Shift-wheel scrolls through time, ctrl-wheel zooms. | | Drop a .mid on the roll | Reads that MIDI file into the current slot, and fills in the MIDI File row. |
Play and Stop drive the internal clock, Panic releases everything the node is holding, Clear Pattern empties the current slot, and Clone To Next Slot copies this pattern, its length and its loop into the next slot and takes you there, wrapping from slot 8 back to slot 1. Every control and button can also be driven from an input.
Random writes a new pattern from nothing and Mutate moves the one that is already there, both steered by Complexity: how busy Random makes it, and how much of it Mutate touches. Random takes its pitches from the rows on screen rather than from the whole keyboard, so it writes where you are looking, and under a scale that means it is in key without having to think about it. Mutate gives each note it picks one change and only one, a degree up or down, a step earlier or later, twice as long or half, louder or quieter, so what comes back is still recognisably the pattern you had.
Quantize pulls notes onto the grid. The grid is Snap, the one you can already see drawn in the roll, so what it will do is on the screen before you press it; with Snap off it is the step. It moves the notes you have selected, or all of them when none is, and only where they start: lengths stay, so a legato you played in stays a legato. Revert takes it back.
Revert swaps the pattern with the copy taken before the last Random, Mutate or Quantize, so pressing it twice puts you back where you were and the two versions are an A/B rather than a one-way door. It only works into the slot the copy came from.
Curve lanes
The node has four controller lanes and a pitch bend lane, always. A lane is a line drawn across the pattern, sent as that controller, or as the wheel, while the pattern plays. The line belongs to the pattern, so every slot draws its own, while the controller each lane sends belongs to the node and stays the same in all of them. An empty lane sends nothing at all, which is why having them all costs nothing.
Lane View decides what the strip under the roll shows: the velocities, one of the four controller lanes, or the pitch bend. The strip is the same one, so the roll keeps the room it had, and it carries the roll's grid: the same step, beat and bar lines, the same snap grid, the same shading outside the loop. What you are drawing lines up with the notes above it without counting. With at least one lane there is a row of buttons across the top of the strip that does the same thing, and next to them the lane's controller number: click it and move a knob or a wheel, and the lane takes that controller. Click it again, or right-click it, to stop waiting.
Lane View has an input and an output pin, so a panel control and the buttons in the strip can follow each other. The playhead runs through the strip as well as the roll, so a curve can be read against it. Every lane also leaves the node as plain CV on a pin of its own, so a curve can drive something in the patch directly rather than going out as MIDI and coming back.
The lane answers to the same three tools the roll does, chosen with the same buttons: the pencil draws, the eraser rubs out and the crosshair selects.
| Gesture | What it does |
|---|---|
| Pencil on the lane | Draws freehand: sweep across and the line follows the pointer, replacing whatever it crosses. A click puts down a single point. |
| Drag a point | Moves it, and everything selected moves with it, keeping its shape. It snaps to the grid like a note does. |
| Crosshair on empty lane | Drags a box round the points inside it. Shift-drag adds them to what is already selected. A click that does not move lets go of everything. |
| Shift-drag with the pencil | Draws the box instead of drawing a line, so a few points can be picked up without a trip to the toolbar. It is the mirror of alt, which draws while the crosshair is up. |
| Click a point | Selects it. Shift-click adds or removes one. A selected point is ringed. |
| Eraser | Click a point to remove it, or drag across several. |
| Right-click a point | Removes it, or the whole selection if it is part of one. Keep the button held and drag to rub out everything you cross. |
| Drag the diamond | Bends that stretch of line: up arches it over the straight line, down lets it sag. There is one halfway along every stretch wide enough to hold it, sitting on the line so it follows the bend it makes. |
| Right-click bare line | Straightens that stretch. |
| Alt on the lane | Bends the stretch of line under the pointer: up arches it over the straight line, down lets it sag. Where there is no line to bend it draws, the same way alt does over the roll. |
| Ctrl-drag (Cmd on a Mac) | Ignores Snap for that gesture only. |
Before the first point and after the last one the line is flat, so a lane never slams a controller shut over a bare patch of pattern. An empty pitch bend lane draws its line down the middle, where a wheel sits when nobody is touching it, and sends nothing until you draw in it.
While you are moving a point, drawing, or bending a stretch of line, a small box beside the pointer shows what you are setting: the controller value from 0 to 127, or the bend signed around its middle.
A lane is not made of straight lines. Every stretch between two points has a diamond halfway along it, and dragging that diamond bends the line: up arches it, down lets it sag, and right-clicking the line straightens it again. It is the same handle and the same gesture the Multi Envelope and the Curve node use, so a curve is drawn the same way wherever you meet one. Alt anywhere on the line does the same thing, for when a stretch is too short to carry a handle.
Recording. While Record is armed, a controller arriving on MIDI In is written into whichever lane is listening for that number, and the pitch wheel into the bend lane, so moving a wheel or a knob draws the line for you and you can tidy it up afterwards. A second pass over the same bar rewrites it rather than drawing on top.
A controller is a position rather than a stream of events, so once you have touched one the lane keeps writing where it is for the rest of the take. That matters most at the ends: a pitch wheel held hard against its top stops sending anything at all, and a lane that only wrote when a message arrived would leave the old curve sitting there exactly where you were holding it. A lane whose controller you never touched is left alone.
Loading and saving a MIDI file
There is a MIDI File row, and four ways into it: drop a .mid on the roll, drop one on the row, browse from the row, or send a path down its pin. All four read the file into the current slot, and a clip dragged out of a DAW is a real file, so Pattern Out sends a pattern to your timeline and this brings one back.
Export MIDI... goes the other way: it writes the current pattern to a .mid wherever you choose. It has a pin like every other button, and it writes the same file the MIDI Drag Exporter does, notes between steps and all.
The path in that row is a note of where the pattern came from, not a link to a file the node plays. Reopening a project does not re-import: the notes are already saved with it, and re-reading the file would silently undo everything you drew after importing. Clearing the row forgets the path and leaves the pattern alone. To deliberately import the same file again, drop it on the roll.
Its timing is read in beats, not seconds, so the same phrase lands on the same grid whatever tempo the file was written at. A clip that sat at bar 17 in some other timeline starts at step 1 here, because what you dragged was the phrase and not its address. The pattern length is rounded up to a whole bar, the loop is set to cover it, and the view frames what arrived.
Import switches the roll to Chromatic, so the file reads exactly as it is. Under a key its notes would land on whichever row was nearest, which draws a different tune from the one you imported. Choose a key afterwards and it refits, which is a decision rather than an accident. Revert undoes an import, so dropping a file over work you liked is safe.
A slot holds 192 notes and 128 steps. If a file runs past either, the roll says so and says which one it was: a file that is simply too long imports at a slower Rate.
Inputs, grouped the way the rows are: MIDI In, Record, Pass Through, Out Ch; Slot, Steps, Loop Start, Loop Length, Clone To Next, Clear Pattern; Random, Mutate, Revert, Complexity; Transport Source, BPM, Rate, Swing, Play Mode, Play, Stop, Panic, Position; Scale, Root; Lane View; Tool, Snap; MIDI File, Export MIDI, Emit Pattern, Emit On Change; Appearance (JSON).
Outputs:
| Output | Description |
|---|---|
| MIDI Out | The notes of the playing pattern, plus whatever came in when Pass Through is on. |
| Step Out | The playhead as CV, 0 at the start of the pattern and 1 at its end. |
| Tool Out | The tool, emitted whenever it changes. |
| Lane 1 to 4 CV | Each controller lane as plain CV, 0 to 1, alongside the CC it sends, so a curve can drive anything in the patch without going out and back through MIDI. |
| Bend CV | The bend lane as CV, 0 to 1 with 0.5 in the middle, which is where no bend is. |
| Pattern Out | The current pattern as JSON, in the format Pattern To MIDI File and the MIDI Drag Exporter read, so a pattern drawn here can be dragged into a DAW as a clip. Emit Pattern sends it on demand. |
MIDI Looper
A phrase looper for MIDI. Arm Record, play something, and your notes are captured into a looping step pattern that plays back on top of the live input (which always passes straight through, so you hear what you play). Timing can follow your music software (Sync set to Host, where the DAW transport drives playback) or run on its own clock (Sync set to Internal, driven by the Play, Pause and Stop buttons and Internal BPM). Stop sends the playhead back to the start like a classic looper, while Pause holds the position so Play carries on from where it left off. The body shows the loop grid, the playhead and the current state (IDLE, PLAY or REC), and it can be placed on the front panel. Recorded takes are saved with the project.
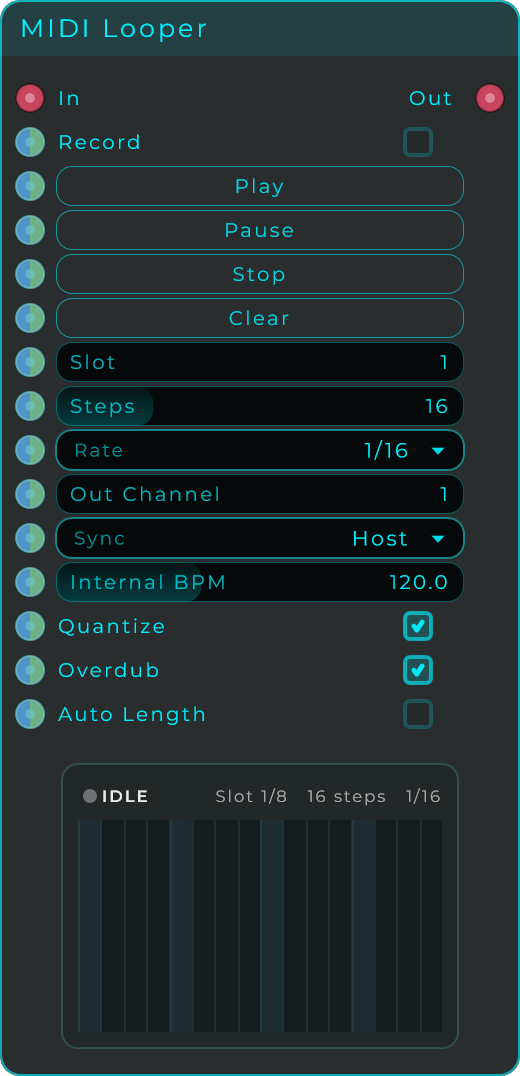
| Parameter | Range | Default | Description |
|---|---|---|---|
| Record | On / Off | Off | Arms recording. Incoming notes are written into the current slot while it is on. |
| Play / Pause / Stop | Buttons / triggers | n/a | Transport for the internal clock. Stop rewinds to the start; Pause keeps the position. In Host sync your music software's transport is in charge instead. |
| Clear | Button / trigger | n/a | Empties the current slot. |
| Slot | 1 to 8 | 1 | Which of the eight pattern memories to record into and play. |
| Steps | 1 to 64 | 16 | Loop length in steps (when Auto Length is off). |
| Rate | Bars and note values (dotted and triplet included) | 1/16 | Musical length of each step. |
| Out Channel | 1 to 16 | 1 | Channel the looped notes play back on. |
| Sync | Host, Internal | Host | Host follows your music software's transport and tempo; Internal uses the built-in clock. |
| Internal BPM | 20 to 300 | 120 | Tempo used in Internal mode. |
| Quantize | On / Off | On | When on, recorded notes snap to the step grid. When off, their exact timing inside the step is kept. |
| Overdub | On / Off | On | When on, new recordings layer on top of what is already there. When off, arming Record starts a fresh take that replaces the old one. |
| Auto Length | On / Off | Off | When on, the first recording defines the loop length: arm Record, play, and the loop locks its length when you Stop, Pause or disarm Record. Leave off to use the fixed Steps length. |
Chords are captured too, with room for up to six notes per step. Every control can be set on the node or driven from an input, so a pedal or a gate can arm recording or fire the transport.
Inputs: MIDI In, Record, Play, Pause, Stop, Clear, Slot, Steps, Rate, Out Channel, Sync, Internal BPM, Quantize, Overdub, Auto Length. Outputs: MIDI Out (the live input plus the looped playback).
Pattern To MIDI File
Turns a Pattern (in JSON text) into an actual MIDI file you can save or drag straight into your music software. It is the way to capture patterns you have made, such as one from the MIDI Riff Generator, as proper MIDI clips.
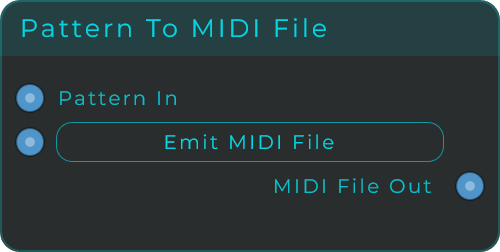
| Parameter | Range | Default | Description |
|---|---|---|---|
| Emit MIDI File | Button / trigger | n/a | Writes the current pattern to a temporary MIDI file and outputs its descriptor. |
A common setup is to run the MIDI Riff Generator's Pattern Out into this node's Pattern In, then send MIDI File Out on to the MIDI Drag Exporter.
Inputs: Pattern In (pattern JSON with step data and timing), Emit MIDI File. Outputs: MIDI File Out (a MIDI file descriptor JSON with the path and file name).
MIDI File Player
Plays a standard MIDI file (.mid or .midi) out of a MIDI output, as if the notes were being performed live. Load a file with the file slot or just drop one onto the node; the body shows the notes it contains. Press Play to start and Stop to end it, or turn on Sync to Host so the file starts, stops and keeps pace with your music software's timeline instead. Use it to feed a synth, an arpeggiator or anything else that takes MIDI.
To choose the tempo yourself, set BPM. It reads File at first, which is the tempo written in the file. Set a number and the file plays at that tempo instead, whatever tempo it was written at, and you can change it while it plays. This is how you set the tempo in the standalone app, where there is no music software to follow.
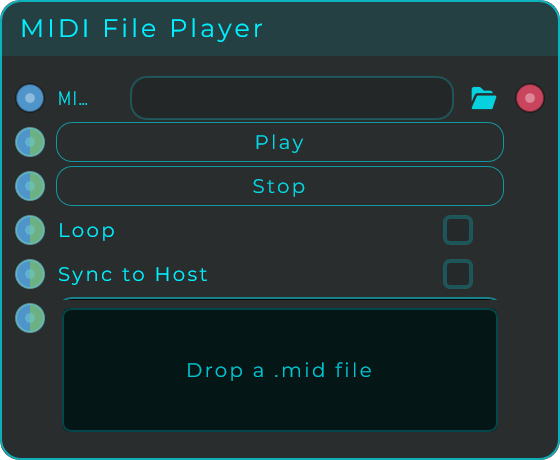
| Parameter | Range | Default | Description |
|---|---|---|---|
| MIDI File | File picker | n/a | The file to play. You can also drop a .mid file straight onto the node. |
| Play / Stop | Buttons / triggers | n/a | Start and stop playback when Sync to Host is off. |
| Loop | On / Off | Off | When on, the file repeats from the top when it reaches the end. |
| Sync to Host | On / Off | Off | Only inside your music software: the file follows its play, stop and tempo and rides the timeline, and Play, Stop and BPM on this node are then not used. The standalone app has nothing to follow, so it does not show this row. |
| BPM | File, 20 to 400 | File | The tempo of the file when you start it with Play. File is the tempo written in the file. |
| Speed | 1/4x, 1/3x, 1/2x, 2/3x, 3/4x, 1x, 1.5x, 2x, 3x, 4x | 1x | A multiple of the tempo in force: the file's, the one in BPM, or your music software's when Sync to Host is on. 1/2x is half time and 2x is double time. |
With a BPM set, or with Sync to Host on, a looped file comes round on a bar line, so it stays in time with everything else. On stop, at the loop point, and when the song position jumps, it sends All Notes Off so nothing keeps ringing. The Play input also works as a gate: an on value starts playback and an off value stops it, so a single toggle or footswitch can run the whole transport. Loop, Sync, BPM and Speed can be driven from inputs too.
Inputs: File, Play, Stop, Loop, Sync, Speed, BPM. Outputs: MIDI Out (the file's MIDI events).
MIDI CC Extract
Watches for one particular knob or slider control (a CC) in the incoming MIDI and turns its position into a steady CV signal in the usual MIDI number range (0 to 127). This lets you take any control your music software or an earlier MIDI node is sending and use it to drive the rest of your patch.
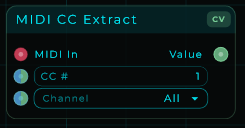
| Parameter | Range | Default | Description |
|---|---|---|---|
| CC # | 0 to 127 | 1 | Which controller to capture. Common ones: 1 Mod Wheel, 7 Volume, 10 Pan, 11 Expression, 64 Sustain. |
| Channel | All, 1 to 16 | All | Channel filter. All matches any channel; pick 1-16 to lock to one. |
It holds the last value it received until a new matching control comes along, starting from 0. CC # and Channel can be set on the node or driven from inputs.
There are two ways out, and they suit different things. Value is a CV line: the last value, held, always there to be read, which is what you want for anything continuous. Data Out sends the same number as a Data value at the moment the control moves, and says nothing in between, which is what you want for anything that acts on each value it receives. Reaching the Data world through a CV to Data instead means that node samples the line on its own clock and repeats the resting value, and a step or a counter downstream counts every one of those.
Inputs: MIDI In, CC #, Channel. Outputs: Value (the latest CC value in 0 to 1, held between updates), Data Out (the same value, sent only when a matching control arrives).
MIDI CC Inject
Takes any moving value (from an LFO, an envelope, a slider or your software's automation) and turns it into a MIDI control message (a CC), blending it into the MIDI output. Whatever MIDI arrives on the In pin passes through untouched, so the node sits neatly in the middle of a MIDI chain. Pair it with MIDI CC Extract to grab a control from your software and send it back out as a different control.
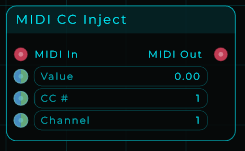
| Parameter | Range | Default | Description |
|---|---|---|---|
| Value | 0 to 127 | 0 | The CC byte to emit. Drag to test, or feed a CV source already scaled to 0-127. |
| CC # | 0 to 127 | 1 | Which controller number to emit. |
| Channel | 1 to 16 | 1 | MIDI channel for the emitted CC. |
It only sends a new message when the value actually changes, so it does not flood the MIDI stream with repeats. A CC that happens at the same moment as notes goes out before them. For a CC that has to land exactly when playback starts, wire the Transport's Playing output into Value, with Value Range at 0..1: the CC goes to 127 when playback starts and back to 0 when it stops.Value, CC # and Channel can be set on the node or driven from inputs.
Inputs: MIDI In, Value, CC #, Channel. Outputs: MIDI Out (the passthrough MIDI plus the generated CC events).
MIDI Voice Allocator
Shares out incoming notes across a set of single-note (mono) outputs, so a chord can be split into one note per output. If you replay the same note it reuses the same output, otherwise it grabs the first free one, and if they are all busy it takes over the one that has been held longest. It handles the Sustain pedal (CC64), All Notes Off and All Sound Off on its own to cut down on stuck notes.
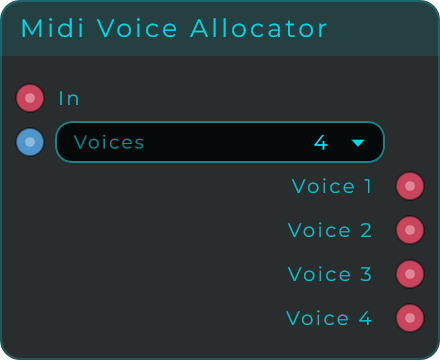
| Parameter | Range | Default | Description |
|---|---|---|---|
| Voices | 1 to 16 | 4 | Number of voice outputs. More outputs appear as you raise the count. |
The Voices count can be set on the node or driven from an input. A common use is one output feeding each single-note MIDI To CV chain.
Inputs: In (polyphonic MIDI), Voices. Outputs: Voice 1 to Voice N (one MIDI stream per allocated voice).
MIDI Pattern Step
Builds a small piece of pattern data (in JSON text) describing a single step. Connect its output straight to the MIDI Riff Generator's Pattern In to set or change just that one step.
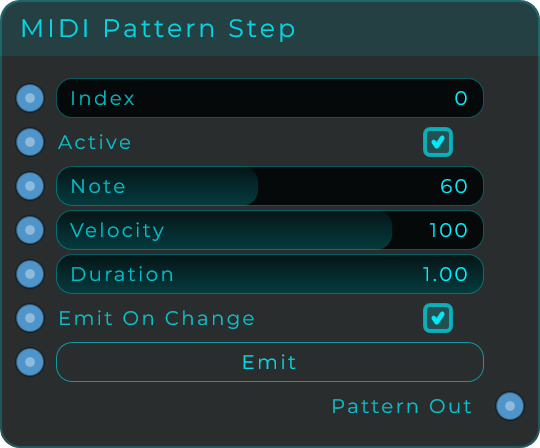
| Parameter | Range | Default | Description |
|---|---|---|---|
| Index | 0 to 127 | 0 | Which step this patch targets. |
| Active | On / Off | On | Whether the step plays. |
| Note | 0 to 127 | 60 | MIDI note for the step. |
| Velocity | 1 to 127 | 100 | Velocity for the step. |
| Duration | 0.1 to 1.0 | 1.0 | Note length as a fraction of the step. |
| Emit On Change | On / Off | On | When on, editing any field sends the patch automatically. |
| Emit | Button / trigger | n/a | Re-sends the current one-step patch. |
Every field can be set on the node or driven from an input.
Inputs: Index, Active, Note, Velocity, Duration, Emit On Change, Emit. Outputs: Pattern Out (a JSON array containing one step patch).
Motif
A melodic phrase generator that thinks in scale degrees rather than fixed notes. You pick a phrase shape and a scale, and Motif plays it; feed a Root note in and the whole phrase transposes to follow, so it stays in key while you change chords underneath. Mutate nudges the phrase into a new variation and Revert takes you back to the one you had, which makes it a fast way to hunt for a line rather than program one.
It can run from the host transport, from its own clock, or step by step from another node's Step or Phase output, so it locks to whatever is already driving your patch.
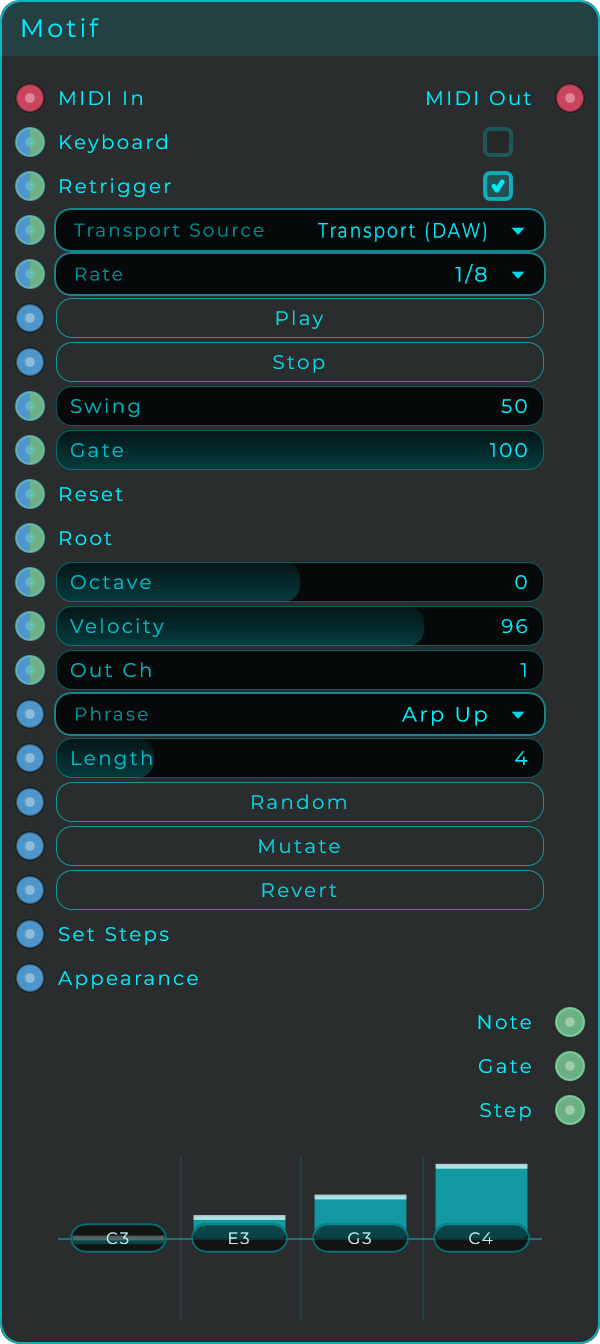
| Parameter | Range | Default | Description |
|---|---|---|---|
| Phrase | Choice | - | The shape of the line, in scale degrees |
| Scale | Choice | - | Scale the degrees are mapped through. Custom uses the notes in Scale Notes |
| Scale Notes | notes, separated by commas | C, D, E, F, G, A, B | The scale written out on C. Type your own (C, D, Eb, G, A) and the Scale becomes Custom with those notes, played from whatever Root the phrase gets |
| Length | 1 - 16 steps | 4 | How many steps of the phrase play before it repeats |
| Transport Source | Host / Internal / External | Host | Where the timing comes from |
| Rate | Choice | - | Musical subdivision of one step |
| BPM | 20 - 300 | 120 | Tempo used when the transport is internal |
| Swing | 50 - 99 | 50 | Delays every other step. 50 is straight |
| Gate | 1 - 100 % | 100 | Note length as a percentage of the step |
| Octave | -3 - +3 | 0 | Shifts the whole phrase in octaves |
| Velocity | 1 - 127 | 96 | Velocity of the notes it plays |
| Out Ch | 1 - 16 | 1 | MIDI channel of the output |
| Keyboard | On / Off | Off | Shows a keyboard on the body |
| Retrigger | On / Off | On | Restarts the phrase when a new root arrives |
| Random | button | - | Builds a brand new phrase |
| Mutate | button | - | Alters the current phrase a little |
| Revert | button | - | Undoes the last Mutate |
| Reverse / Invert / Rotate | button | - | Transform the phrase in place |
| Play / Stop | button | - | Start and stop the internal transport |
Inputs: MIDI In, Step In, Phase, Reset, Root, Set Steps, Appearance Outputs: MIDI Out, Note, Gate, Step
Groove
A drum sequencer with up to 8 lanes, each with its own length. That last part is what makes it more than a step grid: give one lane 16 steps and another 12 and they drift in and out of phase with each other, which is how you get polyrhythm without doing any arithmetic. Each lane has its own note, velocity, probability and micro-timing, and lanes can be muted and soloed while it runs.
Lanes can be filled by hand, rolled at random, or generated as euclidean patterns (the steps spread as evenly as possible across the length), and Rotate slides a pattern round without changing it. The body can be viewed as bars or as a circle, which makes the polyrhythm easy to see.
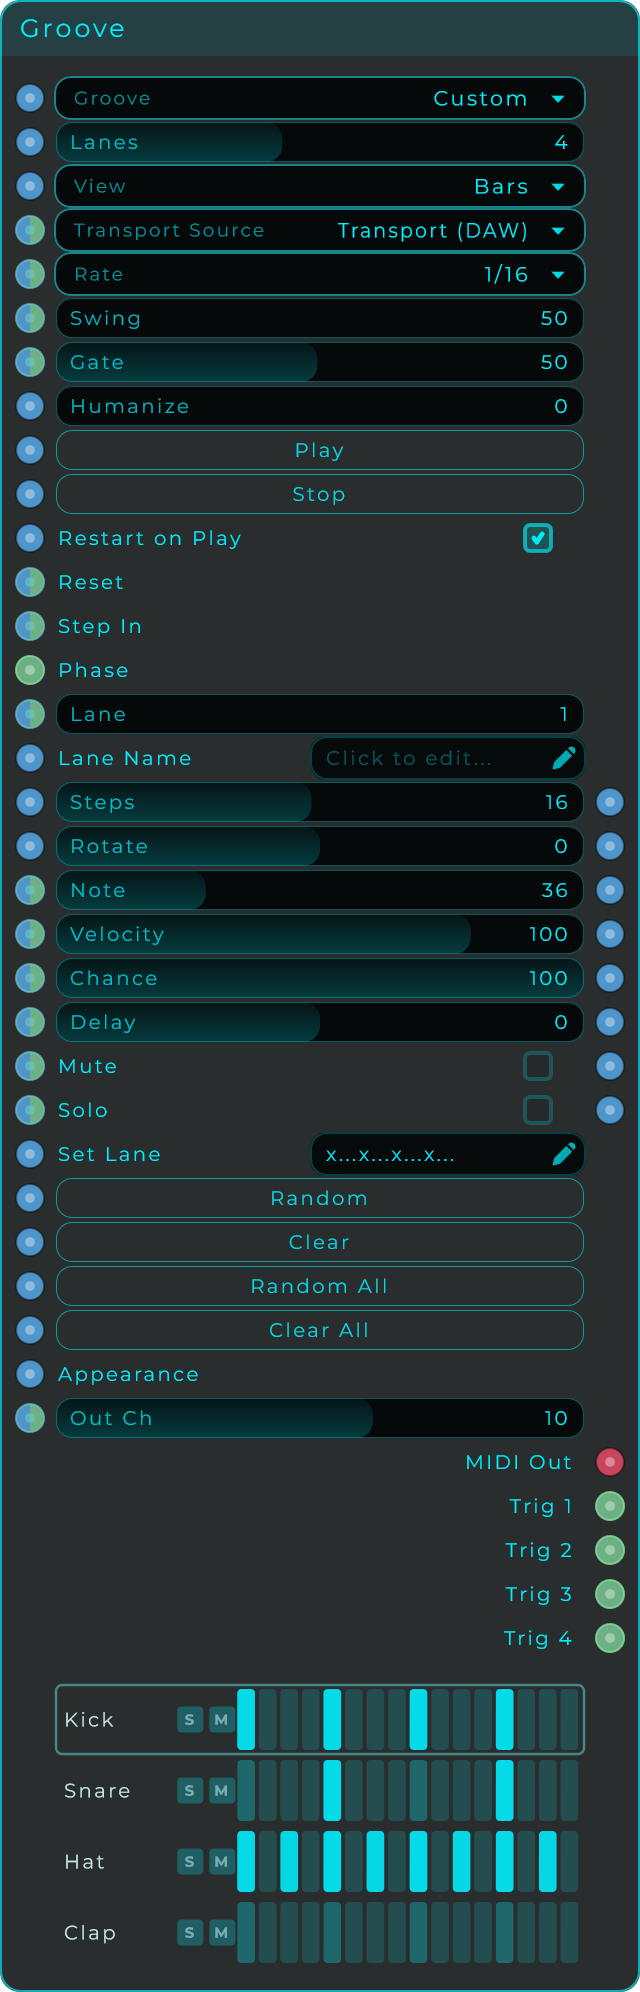
| Parameter | Range | Default | Description |
|---|---|---|---|
| Groove | Choice | Custom | A starting pattern set, or Custom for your own |
| Lanes | 1 - 8 | 4 | How many lanes are running |
| View | Bars / Circle | Bars | How the pattern is drawn on the body |
| Transport Source | Host / Internal / External | Host | Where the timing comes from |
| Rate | Choice | - | Musical subdivision of one step |
| BPM | 20 - 300 | 120 | Tempo used when the transport is internal |
| Swing | 50 - 99 | 50 | Delays every other step. 50 is straight |
| Gate | 1 - 100 % | 50 | Note length as a percentage of the step |
| Humanize | 0 - 100 | 0 | Random timing and velocity variation |
| Restart on Play | On / Off | On | Sends every lane back to step 1 when playback starts |
| Lane | 1 - 8 | 1 | Which lane the controls below are editing |
| Steps | 1 - 32 | 16 | Length of the selected lane. Different lengths give polyrhythm |
| Rotate | -32 - +32 | 0 | Slides the selected lane's pattern round |
| Note | 0 - 127 | 36 | MIDI note the selected lane fires |
| Velocity | 1 - 127 | 100 | Velocity of the selected lane |
| Chance | 0 - 100 % | 100 | Probability that a step actually fires |
| Delay | -90 - +90 | 0 | Micro-timing of the lane, as a percentage of a step |
| Mute / Solo | On / Off | Off | Silence this lane, or hear it alone |
| Out Ch | 1 - 16 | 10 | MIDI channel of the output |
| Random / Clear | button | - | Roll or empty the selected lane |
| Random All / Clear All | button | - | Roll or empty every lane |
| Play / Stop | button | - | Start and stop the internal transport |
Inputs: Reset, Step In, Phase, Appearance Outputs: MIDI Out, plus one Trig per lane
Chord Palette
A rack of chord pads. Each pad holds a chord, and playing the pad plays its notes, so a progression becomes a handful of pads instead of a pile of note numbers. Set a Key and Scale and it fills the pads with a progression that fits; or edit any pad by hand, choosing its root and chord type and then inverting it or moving it an octave until it sits where you want.
The Index input is what makes it more than a pad bank: drive it from a sequencer or a counter and the progression plays itself, one pad per step, while you keep playing on top.
MIDI In plays it from a keyboard: a key holds its chord for as long as you hold the key, and several keys hold several chords at once. Each pad has its own Trigger Key and they need not be in order; Keys From lays them all out at once from that note upwards.
Wire a MIDI Keyboard node into it and that keyboard writes each chord on the key that plays it, so you can see the whole mapping at a glance and play it with the mouse or from your own keyboard. To give a pad a key, drag the pad's number onto that key; to move it, drag it onto another one. To take a key away, right-click it on the keyboard and clear it, or use Clear Trigger Key in the pad's menu, or set the pad's Trigger Key to None. Let the same drag go outside MNodes instead, on a folder or your DAW's timeline, and the chord lands there as a MIDI file. The keyboard's Assigned Keys colour tells the keys that do something apart from the ones that do not. While any key is down the keyboard is in charge and Index is ignored; let go and Index takes over again.
Arranging the rack: hold Ctrl (Cmd on a Mac) and drag a pad onto another to move it there, hold Alt to drop a copy instead, and hold Ctrl and Shift together to take the whole row along and swap it with the row you drop it on. The chords move, the trigger keys stay with the positions. The pad's menu (the three dots, or a right-click) has Move Row Up and Move Row Down for the same thing. Squeezed small on a front panel the rack folds into fewer rows and then shrinks the pads rather than hide any: the names and the buttons drop out when they no longer fit, the pads never do.
First Index says which Index value plays the first pad. It is 1 by default, so 1 is the first pad and 0 is silence. Move it and the rack answers to whatever numbers the thing driving it already sends: a grid controller whose second page sends MIDI notes 64 upwards drives a second palette set to 64, with no maths node in between. The pads show the numbers that play them, so the rack reads like the controller in front of you.
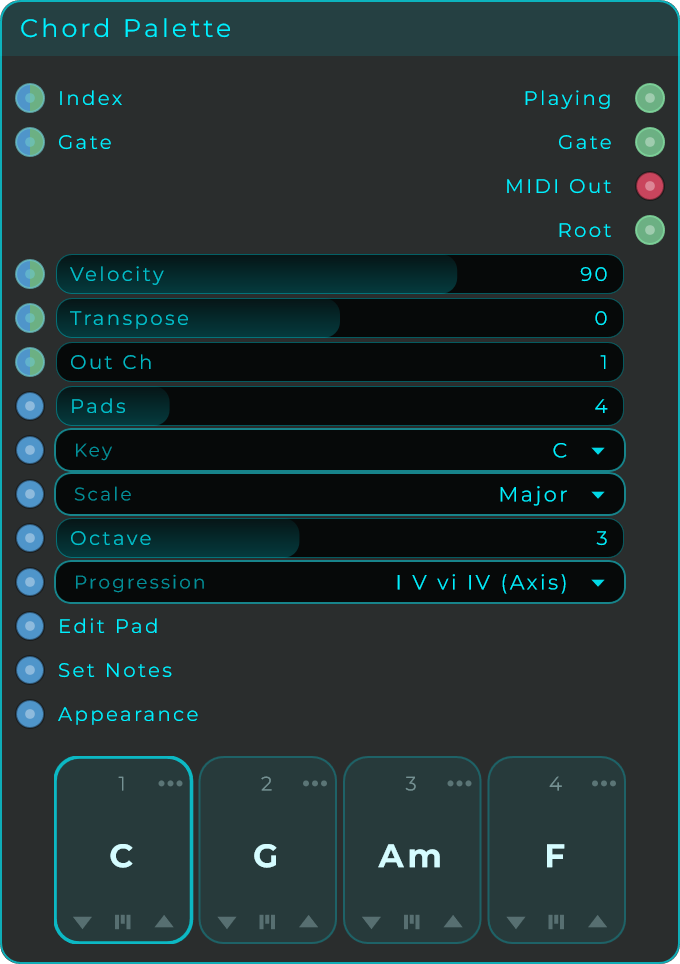
| Parameter | Range | Default | Description |
|---|---|---|---|
| Pads | 1 - 64 | 4 | How many pads the rack holds |
| First Index | 0 - 127 | 1 | Which Index value plays the first pad |
| Keys From | 0 - 127 | 60 | Lays every pad's trigger key out from this note |
| Trigger Key | -1 - 127 | - | The MIDI note that plays the pad being edited. -1 for none |
| Key | Choice | C | Root key used when filling from a progression |
| Scale | Choice | - | Scale used when filling from a progression. Custom uses the notes in Scale Notes |
| Scale Notes | notes, separated by commas | C, D, E, F, G, A, B | The notes of the Key and Scale. Type your own (C, D, Eb, G, A) and the Scale becomes Custom with those notes, which the Key moves like any other scale |
| Progression | Choice | - | A ready-made chord progression to fill the pads with |
| Octave | 0 - 7 | 3 | Octave the chords are voiced in |
| Velocity | 1 - 127 | 90 | Velocity of the notes it plays |
| Transpose | -48 - +48 | 0 | Shifts everything in semitones |
| Out Ch | 1 - 16 | 1 | MIDI channel of the output |
| Edit Pad | 1 - 64 | 1 | Which pad the controls below are editing |
| Root | Choice | C | Root note of the pad being edited |
| Chord | Choice | - | Chord type of the pad being edited |
| Set Pad to This Chord | button | - | Writes Root and Chord into the selected pad |
| Invert Up / Invert Down | button | - | Moves the lowest or highest note an octave |
| Octave Up / Octave Down | button | - | Moves the whole pad an octave |
| Clear Pad | button | - | Empties the selected pad |
| Rows | Auto / 1 - 8 | Auto | How the pads are laid out on the body |
| Pad Height | 0 - 200 | 0 | Fixed pad height. 0 shares the space evenly |
Inputs: MIDI In, Index, First Index, Keys From, Gate, Edit Pad, Set Notes, Scale Notes (text), Appearance Outputs: MIDI Out, Playing, Gate, Root
Chord Lattice
The chord lattice as something you play. Notes are laid out so that chords become shapes: one step to the right is a fifth up, one step up and to the right is a major third up, and one step up and to the left is a minor third down. Every small triangle of three neighbouring notes is a chord. The triangles pointing up are major chords and the ones pointing down are minor chords. Music theory calls this picture a Tonnetz.
Needs: a Chord Lattice on the graph with C major held (its triangle lit), Key C and Scale Major tinting the notes, a trail of four numbered chords, and the keyboard drawn underneath.
Playing it. Click a note to play that note, a side of a triangle to play its interval (a fifth, a major third or a minor third), or the inside of a triangle to play its chord. Drag across the lattice and the sound follows the mouse. With Hold on, what you click keeps sounding until you click something else or click it again.
Playing it from a MIDI keyboard. Set MIDI Keys to Zones and the keyboard is split in three, so one finger plays a whole shape:
- Every key below Pairs From (C3 unless you change it) plays the chord on its note. Chord Quality says whether it is major or minor; From Key picks the one that fits the Key and Scale best, so in C major the white keys give C, Dm, Em, F, G, Am and Bm.
- Every key from Pairs From up to Notes From (C4) plays a pair: its note and the fifth above, or the major or minor third above, as Pair says.
- Every key from Notes From up plays its own note, for a melody over the chords.
Chords and pairs sound in the Octave, the way a click plays them, and light up on the lattice. Pass Through, the default, sends MIDI In on as it comes.
Needs: a Chord Lattice with MIDI Keys on Zones, the D2 key held and lit on the drawn keyboard, and Dm lit on the lattice.
Seeing what every key plays. Under the lattice there is a keyboard that shows it:
- Above the keys, each zone says where it starts and ends: Chords, Pairs and Notes.
- Every key has written on it what it plays: the chord (Dm), the pair (C+G) or the note (D4). The chords of the black keys are written just above them.
- A key you hold on your MIDI keyboard lights up there, while what it plays lights up on the lattice. You can also play the drawn keys with the mouse: they sound while you hold them, just like real keys.
- It works the other way round too. Click a note, a side or a triangle of the lattice and the key that plays it is outlined on the drawn keyboard. Nothing is outlined when no key plays it, for example Cm when the Key makes the C keys play C major.
- The chords of the trail are numbered in the order you played them, so you can follow your path.
Both switches are in the Appearance section: turn off Show Keyboard to hide the keyboard and give the whole node to the lattice, or turn on Show Keys on Lattice to write on every triangle the key that plays it.
Why it sounds smooth. Two triangles that share a side share two notes, so moving to a neighbouring triangle changes a single note by a step. A progression that walks from triangle to triangle is smooth by construction. With Voicing set to Smooth, each chord you click is played as close as possible to the one before: the shared notes stay where they are and only the other one moves.
Watching it. MIDI In passes straight through to MIDI Out along with what you click, and everything that sounds lights up on the lattice: notes, the sides between them, and whole triangles when a chord is complete. The last chords leave a Trail, so a progression reads as a path. The name of what is sounding goes out of Chord as text, the same name the MIDI Chord Detector gives.
Keys as regions. Key and Scale tint the notes of a key. The chords of that key are the triangles whose three notes are all tinted, so a key shows up as a region of the lattice and a change of key as a move to another region. Choose Chromatic to tint nothing.
Your own notes. Scale Notes shows the notes of the Key and Scale, separated by commas (C, D, E, F, G, A, B for C Major). Type your own there, for example C, D, Eb, G, A, and the Scale switches to Custom with those notes. Sharps and flats both work (F# or Gb), and so do numbers from another node (0 to 11, or MIDI notes like 60). From then on the Key moves your notes like any other scale: the same notes typed with Key C become D, E, F, A, B with Key D. Picking Custom from the list the first time starts from the scale that was showing, so you can change one note of a scale instead of typing it all.
Wire a Lattice Walk into MIDI In to watch its walk move across the lattice, or wire this node's MIDI Out into a Lattice Walk and click a chord to make the walk jump there. Use one of the two at a time: with both, the walk hears its own chords come back. The lattice also goes on the Front Panel like any widget.
| Parameter | Range | Default | Description |
|---|---|---|---|
| MIDI Keys | Pass Through / Zones | Pass Through | Pass Through sends MIDI In on as it comes; Zones plays chords, pairs and notes by where the key is |
| Hold | On / Off | Off | What you click keeps sounding after you let go, until you click something else or click it again |
| Octave | 0 - 6 | 3 | The octave clicked notes and chords are played in. A root position chord starts on the C of this octave; 3 is middle C |
| Key | C - B | C | The key note of the region to tint |
| Scale | Scale list | Major | The scale of the region to tint. Chromatic tints nothing; Custom uses the notes in Scale Notes |
| Scale Notes | notes, separated by commas | C, D, E, F, G, A, B | The notes of the Key and Scale. Type your own (C, D, Eb, G, A) and the Scale becomes Custom with those notes |
| Chord | (read-only) | - | The name of what is sounding |
| Velocity | 1 - 127 | 100 | How hard clicked notes are played |
| Out Ch | 1 - 16 | 1 | MIDI channel of clicked notes. Incoming MIDI keeps its own channel |
| Voicing | Smooth / Close | Smooth | Smooth plays each clicked chord as close as it can to the one before; Close plays every chord in root position |
| Trail | 0 - 16 | 6 | How many of the last chords the trail joins up. 0 draws no trail |
| Centre | C - B | C | The note in the middle of the view |
| Accidentals | Sharps / Flats | Sharps | Spelling of the note names and of the Chord name |
| Pairs From | a note | C3 | With Zones, the lowest key that plays a pair; every key below plays a chord |
| Notes From | a note | C4 | With Zones, the lowest key that plays its own note. Keep it above Pairs From |
| Chord Quality | From Key / Major / Minor | From Key | Whether a chord key plays a major or a minor chord. From Key picks the one with more notes in the Key and Scale |
| Pair | Fifth / Major Third / Minor Third | Fifth | What a pair key adds above its note |
The look is in the Appearance section: Zoom (how close the lattice is drawn; at 100 % about three rows of triangles fill it, and it grows with the node), Show Note Names, Show Keyboard, Show Keys on Lattice, and the colours of the background, the lines, the major and minor triangles, the notes, the notes in the key, whatever is sounding, the trail, the text and the white and black keys, plus the corners and the font.
Inputs: MIDI In, MIDI Keys, Hold, Octave, Key, Scale, Scale Notes (text), Appearance Outputs: MIDI Out, Chord (text)
Lattice Walk
Holds one major or minor chord and walks it to a neighbouring chord on the chord lattice whenever it is told to. Each move changes a single note by a semitone or a tone, and the voicing moves as little as it can, so a clock into Step plays a progression that is smooth by construction. Play a chord into MIDI In and the walk jumps there and goes on from it.
Needs: a Lattice Walk on the graph with a clock into Step, the compass showing Am in the middle with C, F and A around it, and the sequence strip with its second step lit.
The moves. Every chord has three neighbours on the lattice that share two of its notes, and each has a letter:
| Move | What it does | From C |
|---|---|---|
| P (parallel) | Swaps major and minor on the same root | Cm |
| R (relative) | Goes to the relative chord | Am |
| L (leading tone) | Goes to the chord a third away that keeps two notes | Em |
| N | R, then L, then P | Fm |
| S (slide) | L, then P, then R | C#m |
| H | L, then P, then L | G#m |
Every move undoes itself: P twice lands back where it started.
The body. The top is a compass: the chord the walk is on sits in the middle, and the three chords P, L and R go to sit around it, each on the side of the triangle it shares, labelled with its letter and its name. Click one of them to take that move, or click the middle for a Step. The middle lights up while the chord sounds. Under the compass are the steps of the Sequence: the step just played is lit and the next one is outlined. In Random mode the strip shows the last move instead. The body also goes on the Front Panel like any widget, so the compass can be played from there.
Moving by hand. Press P, L or R, or send them an event, a value of 0.5 or more or a rising CV edge, and the chord moves that way and plays.
Step. Step plays the next move of the Sequence in Sequence mode, or a random move in Random mode. After a Reset, a Stop or on a fresh node, the first Step plays the chord itself without moving, so a Reset on the downbeat starts the progression on its first chord. Reset goes back to the Start chord and the first step and stops the chord; Stop only stops it.
When a chord stops. A chord keeps sounding until the next one plays. Stop and Reset stop it, and so do the transport stopping and an All Notes Off arriving at MIDI In (a DAW stopping, or a MIDI Panic). Letting go of the keys at MIDI In stops it too, as Keyboard says below.
Writing a sequence. Write the steps separated by commas: R, L, R, L. A step can chain up to four moves, so RL takes R and then L in a single step, and - stays on the chord for a step. Spaces inside a step do not split it: L R between two commas is the same step as LR. The sequence goes round and round. Moves are relative, so a sequence written from C plays the same progression from any Start chord. Sequence Preset writes some useful ones:
| Preset | Sequence | From C |
|---|---|---|
| P L: six chords, round | P, L | C Cm G# G#m E Em, and round again |
| P R: eight chords, round | P, R | C Cm D# D#m F# F#m A Am, and round again |
| R L: down in thirds | R, L | C Am F Dm A# Gm, on through all 24 chords |
| L R: up in fifths | L, R | C Em G Bm D F#m, on through all 24 chords |
| I vi IV V | R, L, LRLR, RL | C Am F G |
| I V vi IV | LR, RLR, L, LR | C G Am F |
Random mode. Each move is picked by its weight (P, L, R, N, S and H Weight). No Backtrack keeps it from making the same move twice in a row, which would only undo it. Stay in Key only takes moves that land on a chord made of notes of the Key and Scale you choose; when no move fits, the walk stays on its chord. Scale Notes shows those notes; type your own (C, D, Eb, G, A) and the Scale becomes Custom with them.
Playing it from MIDI In. Play a chord or a single key into MIDI In and the walk jumps to that chord, plays it and starts the Sequence over, so every Step and move after that goes on from what you played. A single key gives the chord of that key, major or minor as Start is; two keys that are not a chord yet leave the walk where it is. Keyboard says what letting go of the keys does:
- Play While Held (the default): letting go of every key stops the chord. Step and the moves still play while no key is held.
- Only While Held: the walk only sounds while you hold keys. Step and the moves that arrive while no key is held are ignored, and the compass dims while it waits for a key.
- Keep Playing: the chord keeps sounding after you let go, until the next one.
A Chord Lattice wired into MIDI In works the same way: click a chord on it and the walk jumps there. Send only the walk to your instrument then, or you hear the clicked chord twice. Wire them one way or the other, not both: a Chord Lattice passes on what comes into it, so a walk that also feeds it hears its own chords come back and keeps jumping to them.
How it sounds. Voicing Smooth keeps the notes two chords share where they are and moves the other the least it can, staying around the Octave; Close plays every chord in root position. Tie Common Notes lets shared notes keep sounding through a change instead of playing them again. Bass Note adds the root an octave below; when the chord above already plays that note, it is played once.
Every setting has its own row and its own input on the node:
| Parameter | Range | Default | Description |
|---|---|---|---|
| Keyboard | Play While Held / Only While Held / Keep Playing | Play While Held | What letting go of the keys at MIDI In does |
| Step / P / L / R | button | - | Step plays the next move; P, L and R take that move |
| Reset / Stop | button | - | Reset goes back to the Start chord and stops; Stop only stops. The transport stopping stops as well |
| Mode | Sequence / Random | Sequence | Where the moves of Step come from |
| Sequence | text | R, L | The steps, separated by commas |
| Sequence Preset | list | R L: down in thirds | Writes a ready made Sequence. Editing the Sequence turns it to Custom |
| Start | C, Cm ... B, Bm | C | The chord the walk begins on and goes back to on Reset. Changed while the walk waits for its first Step, it takes effect at once |
| Voicing | Smooth / Close | Smooth | Smooth moves as little as possible; Close is root position |
| Tie Common Notes | On / Off | On | Shared notes keep sounding through a change |
| Bass Note | On / Off | Off | Adds the root an octave below |
| Octave | 0 - 6 | 3 | Where the chords sit; 3 is middle C |
| Velocity | 1 - 127 | 100 | How hard the notes are played |
| Out Ch | 1 - 16 | 1 | MIDI channel of the chords |
| P, L, R, N, S, H Weight | 0 - 100 | 50, 50, 50, 0, 0, 0 | How often Random mode picks each move |
| No Backtrack | On / Off | On | Random mode never undoes the move it just made |
| Stay in Key | On / Off | Off | Random mode only moves to chords of the Key and Scale |
| Key / Scale | C - B / scale list | C / Major | The key Stay in Key uses |
| Scale Notes | notes, separated by commas | C, D, E, F, G, A, B | The notes of the Key and Scale. Type your own and the Scale becomes Custom with those notes |
| Accidentals | Sharps / Flats | Sharps | Spelling of the chord names |
| Chord | (read-only) | - | The chord the walk is on |
| Move | (read-only) | - | The move just made |
The look of the body is in the Appearance section: the background, the chord in the middle, the neighbours, the accent for the sounding chord and the step just played, the text, the corners and the font.
Inputs: MIDI In; Step, P, L, R, Reset, Stop (event, value or CV edge); Keyboard, Mode, Sequence, Sequence Preset, Start, Voicing, Tie Common Notes, Bass Note, Octave, Velocity, Out Ch, P, L, R, N, S and H Weight, No Backtrack, Stay in Key, Key, Scale, Scale Notes (text), Accidentals, Appearance (value) Outputs: MIDI Out, Root (the root as a MIDI note number, CV), Gate (1 while a chord sounds, CV), Position (the step just played, counting from 1, CV), Chord (text), Move (text)
MIDI Note Splitter
Takes a chord arriving on one MIDI input and hands each note its own set of outputs, so you can drive several voices from one keyboard part. Held notes are sorted low to high (or high to low), and each slot gives you the note, its gate and optionally its velocity and its MIDI channel.
Useful for building your own polyphony out of mono voices, for splitting a chord across different timbres, or for sending the bass note somewhere different from the rest.
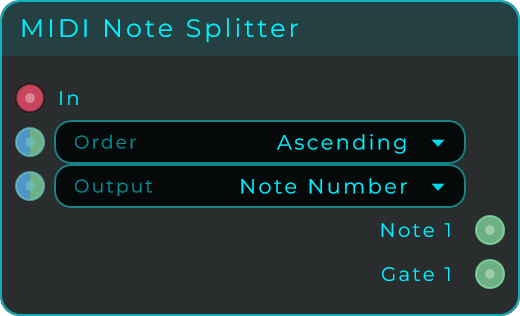
| Parameter | Range | Default | Description |
|---|---|---|---|
| Slots | 1 - 16 | 1 | How many notes are broken out |
| Order | Ascending / Descending | Ascending | Whether slot 1 is the lowest or the highest held note |
| Output | Note Number / Pitch (V/oct) / Note Hz | Note Number | What the note outputs carry |
| Velocity | On / Off | Off | Adds a velocity output per slot |
| Channel | On / Off | Off | Adds a MIDI channel output per slot, 1 to 16 |
| MIDI Out | On / Off | Off | Adds a MIDI output per slot, carrying the note that slot holds |
MPE
Under MPE every note of a chord arrives on its own MIDI channel, and that channel is what carries its pitch bend, its pressure and its slide. Turn Channel on and each slot reports the channel its note came in on, next to the note itself. That is the piece you need to send each note's own expression to the voice playing it, and there is no other way to work it out once a chord has landed all at once.
One caveat: held notes are tracked by pitch, so the same pitch arriving twice on two different channels counts as one held note, and its Channel output reports the later of the two.
Notes as notes
The outputs above describe a note: its number, its gate, how hard it was hit. An instrument wants the note itself. Turn MIDI Out on and each slot gains a MIDI output carrying whatever that slot is holding, on the channel and at the velocity it arrived with, so slot 1 can drive one instrument with the lowest note you are holding and slot 2 another with the next one up.
MIDI Voice Allocator also hands notes out as MIDI across numbered outputs, and it is the right node when you want your own polyphony: it keeps a note on the output it started on, so its outputs are ordered by when you played. This one orders by pitch, so playing a note below the current lowest shifts every slot up one. That is the whole difference, and it is why both exist.
With MIDI Out on there is usually no reason for Channel as well, since the MIDI already carries it.
Inputs: In (MIDI) Outputs: Note, Gate and optionally Velocity, Channel and MIDI, one set per slot